How to Make Videos With Claude in 2026 (Step-by-Step)
Claude can't render video alone. Use it to write scripts, link an MCP video connector like Clippie, or code motion graphics with Remotion or HyperFrames.
 Emmanuel Greyco Tulabut

On this page
If you searched for how to make videos with Claude, you have probably seen creators post finished Shorts and explainers that started as a Claude chat. Searches for this on YouTube have climbed sharply this autumn. The catch: Claude does not render video on its own.
What it can do is write the script, direct the scenes and, through connectors and code, drive the tools that render. This guide explains the three routes that actually work in late 2026, gives a step-by-step walkthrough of the connector route, and shares prompts you can copy for faceless and stickman videos.
Executive summary: This guide explains what making videos with Claude really involves, the three working routes (Claude as writer, Claude plus an MCP video connector, and Claude Code with Remotion or HyperFrames), what each costs and requires, and which suits your channel. It is for faceless creators and developers. You will leave with a working setup, copy-ready prompts and a list of mistakes to avoid.
Table of Contents
What "Making Videos With Claude" Actually Means
What You Need Before You Start
Route 1: Use Claude as Your Writer and Director
Route 2: Make the Video Inside Claude With an MCP Connector
Route 3: Claude Code With Remotion or HyperFrames
Example Prompts for Claude Video Workflows
Which Route Fits Your Channel
Mistakes to Avoid When Making Videos With Claude
FAQs
What to Do Next

What "Making Videos With Claude" Actually Means
Claude is a text and code model, so it does not output MP4 files. "Making videos with Claude" means Claude writes and plans the video, then hands the rendering to something else: a video app you paste into, a connector Claude controls, or code that Claude writes and runs.
Claude's in-chat visuals, added in March 2026, are HTML and SVG charts and diagrams, not video.
The three working routes:
Route 1, Claude as writer and director: Claude produces the script, scene list and image prompts. You paste them into a video tool.
Route 2, Claude plus an MCP connector: Claude calls a video platform's tools directly, so the project is created from the chat.
Route 3, Claude Code plus a code video framework: Claude writes Remotion or HyperFrames code that renders animation to MP4.

What You Need Before You Start
You need a Claude account, a clear video format, and one rendering tool that matches your route. Route 1 works on any Claude plan. Route 2 needs a connector-enabled Claude plan and a paid account with the video platform. Route 3 needs Claude Code, Node.js and FFmpeg.
For every route:
A format decision: 9:16 or 16:9, target length and a visual look.
A voice plan: AI voice, your own recording, or none.
Review time: Claude can make mistakes, so check scripts and previews.
For Route 2 (connectors): Anthropic's help center says custom connectors using remote MCP are available on Free, Pro, Max, Ultra, Team and Enterprise plans, with Free users limited to one custom connector. On Team and Enterprise, an Owner adds the connector in organization settings first.
For Route 3 (code): Claude Code is included with paid Claude subscriptions such as Pro and Max, and Team and Enterprise have their own setup. HyperFrames lists Node.js 22+ and FFmpeg as requirements.

Route 1: Use Claude as Your Writer and Director
In Route 1, Claude does the thinking and a separate video tool does the rendering. You ask Claude for a timed script, a scene-by-scene shot list and image prompts, then paste them into a script-to-video app or editor. It is the simplest route and works with any tool.
Why it matters: the script decides most of a faceless video's quality, and Claude is strong at hooks, pacing and rewriting to a word count.
How to apply it:
Ask for structure, not just prose: hook line, numbered scenes, one narration line and one visual description per scene.
Give a runtime target: roughly 150 words is a sensible starting point for a 60-second voiceover, then check the tool's runtime estimate.
Ask for a consistent character description and reuse it in every image prompt.
Our guide on turning a written script into a finished AI video covers the paste-in stage.
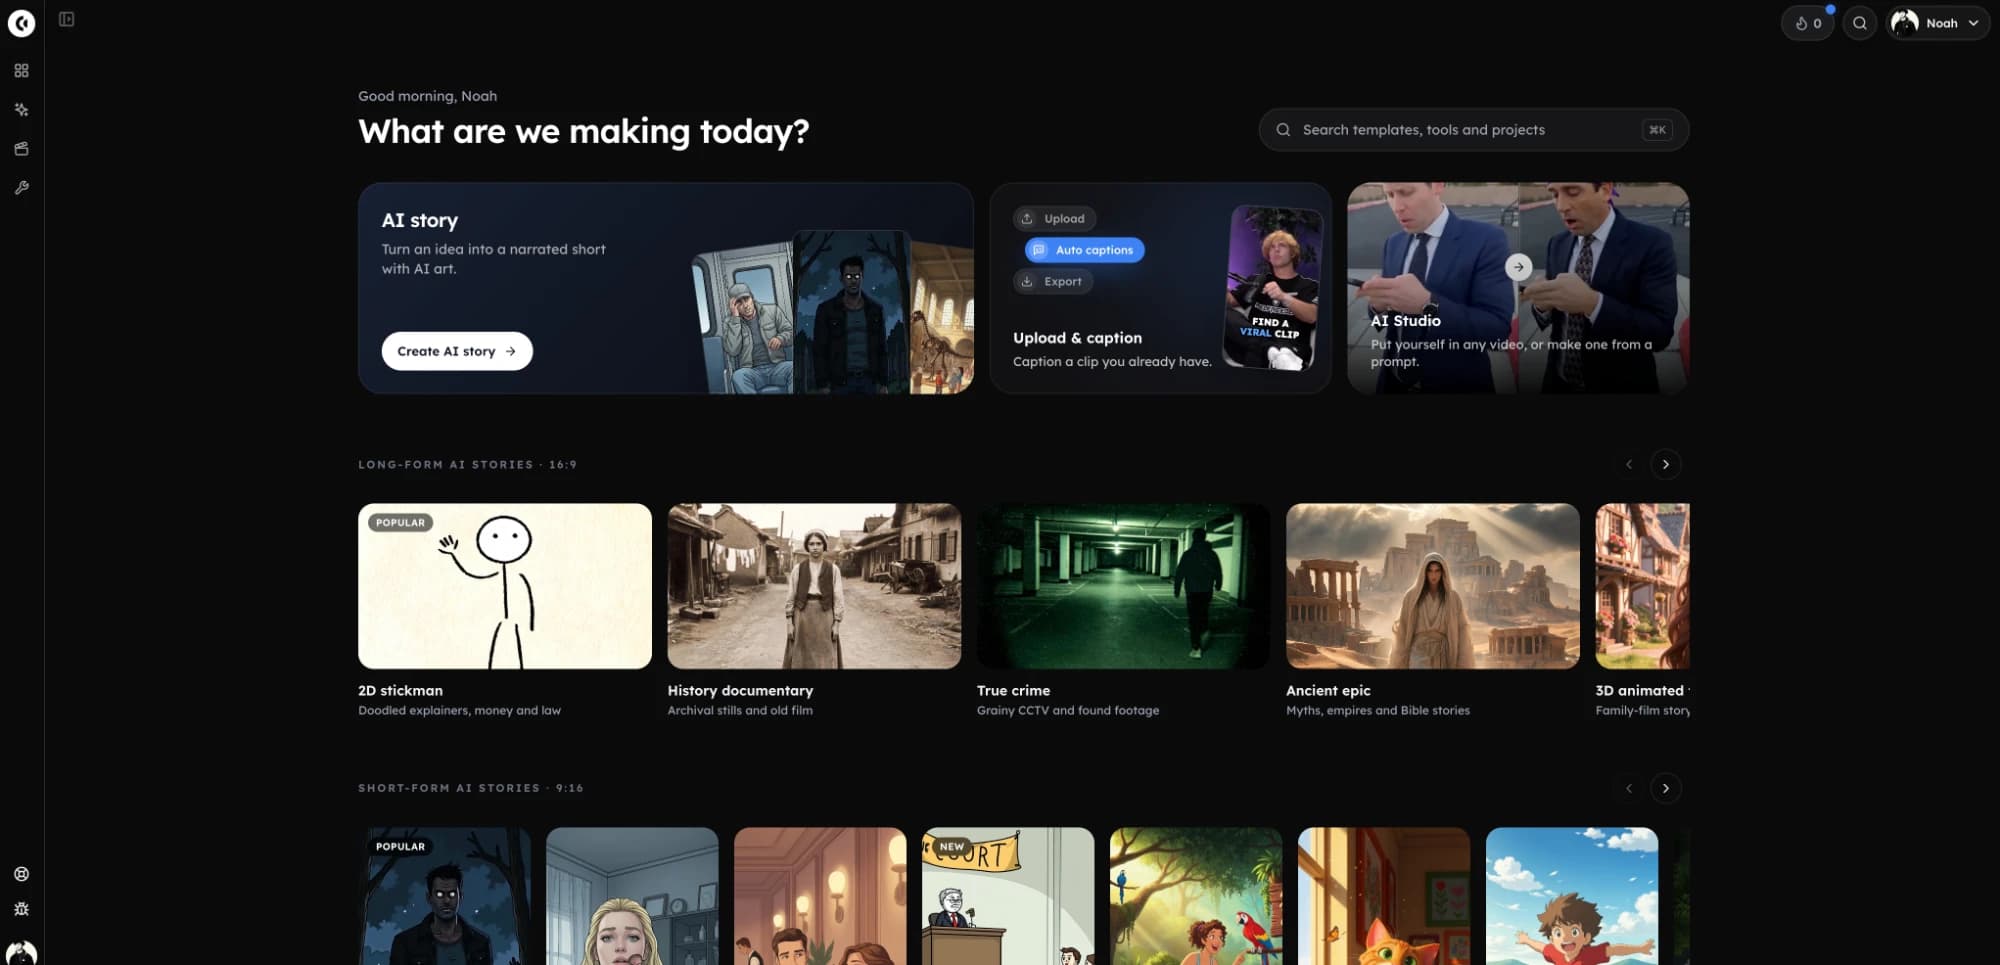
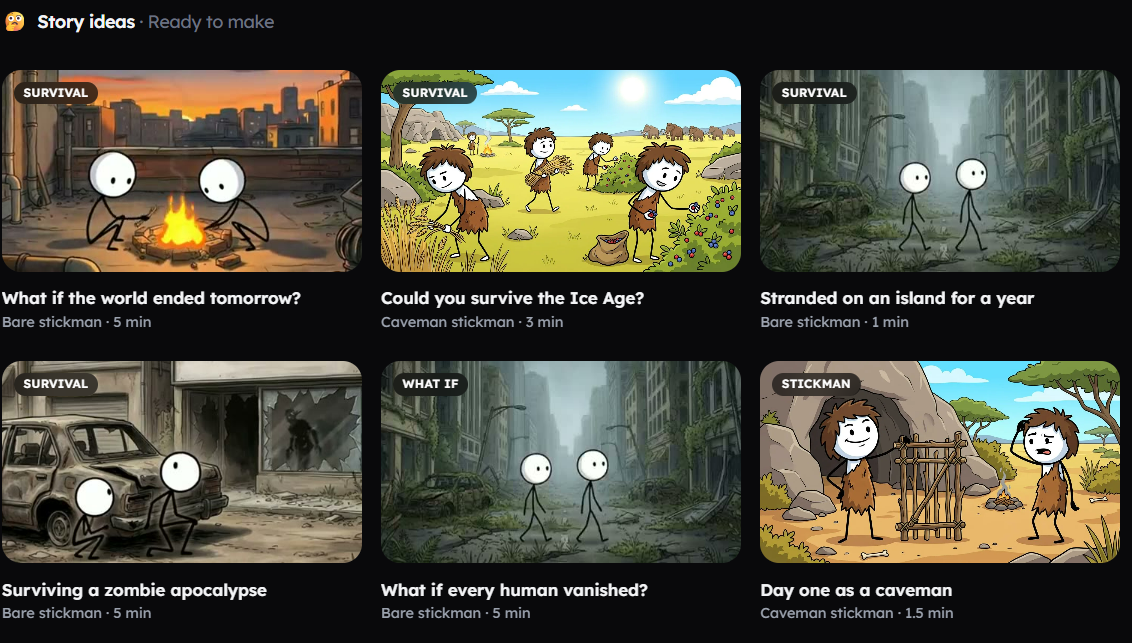
Example use case: in Clippie's AI Story generator you can paste the Claude script, pick a look such as the Bare stickman template, choose a voice style, and generate scenes, voiceover and captions. This walkthrough of a paper-cut animation that starts with a Claude story and script shows the same hand-off in a different style.
Where it falls short: copying between apps is manual, so batch work gets slow. Claude also cannot see the output, so you judge the visuals yourself.

Route 2: Make the Video Inside Claude With an MCP Connector
MCP (Model Context Protocol) lets Claude call another app's tools. With a video platform's MCP server connected, Claude can write the script, create the project, show a preview and render, all from the chat. Clippie's MCP server, launched October 24, 2026, is one example and requires a paid Clippie plan.
Why it matters: you stop copying and pasting, and Claude can change specific scenes when you ask. The connector uses the same credits and minutes as the Clippie app, with no API surcharge.
Step 1: Add the Connector in Claude
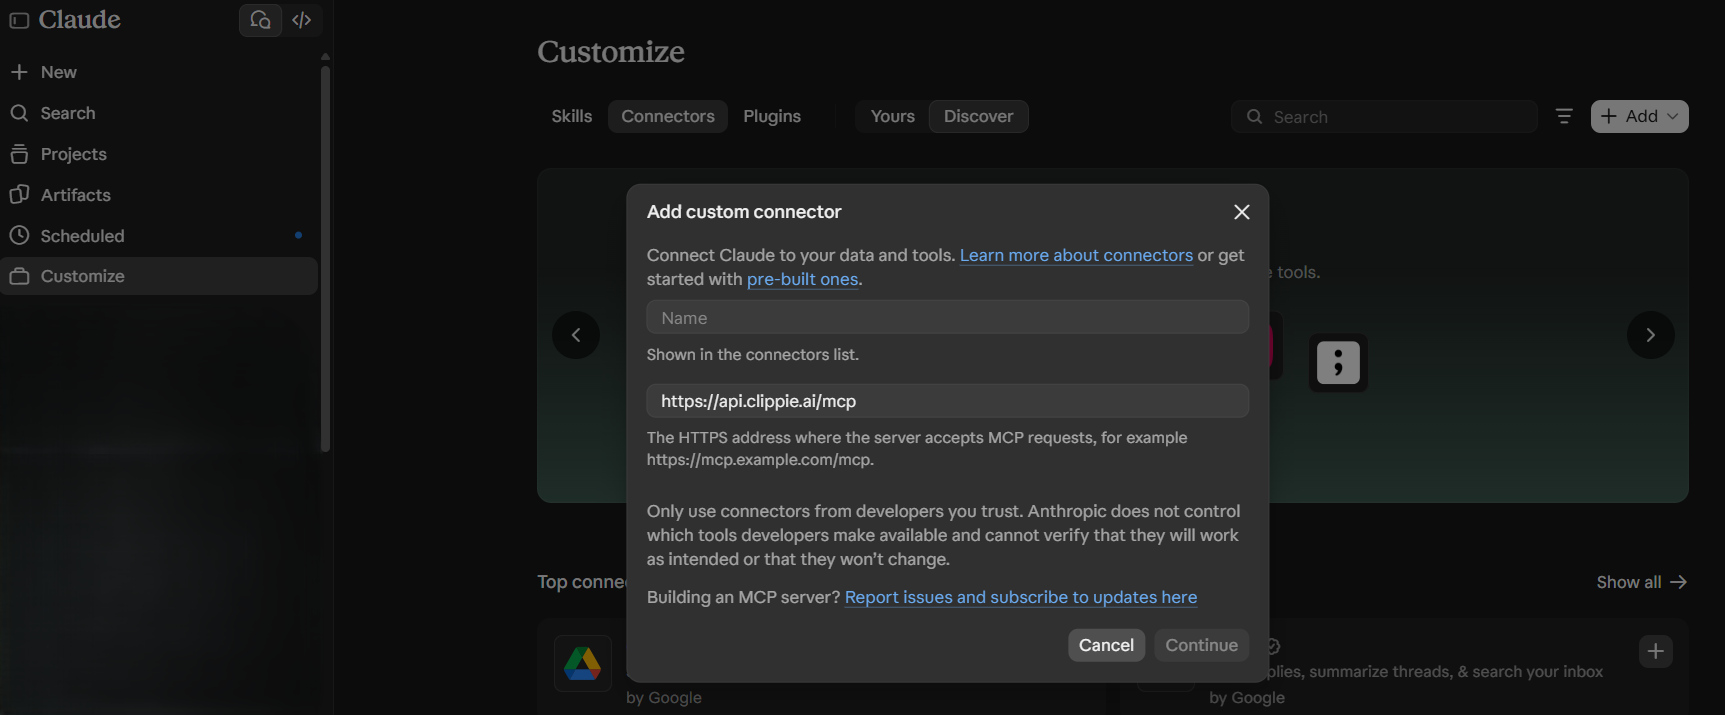
In Claude on web or desktop, open Customize, then Connectors.
Choose +, then Add custom connector, name it Clippie and paste
https://api.clippie.ai/mcp.Click Connect, sign in with your Clippie account and allow access.
In a chat, use the + button, then Connectors, to switch it on.
Claude Code users add it from the terminal instead: claude mcp add --transport http clippie https://api.clippie.ai/mcp with an API key header, as shown on Clippie's developer page for the MCP server and API.
Step 2: Ask Claude to Write the Script
Describe the topic, length, format and tone. Ask to see the script before anything is created, and edit it until it reads well aloud.
Step 3: Pick a Look and Check the Cost
Ask Claude to list the available story templates or art styles.
For stickman videos, the AI Story templates include Bare stickman, Doodle explainer, Caveman stickman, Painted stickman and Classic stickman, each in 9:16 and 16:9.
Ask for a cost estimate or dry run first. It returns the credits and minutes a video will use without spending anything.
Step 4: Create the AI Story Project
Approve the estimate and Claude creates the AI Story video with your script, template and voice style. Voice-acting tags such as [whispers] or [long pause] are performed rather than read aloud.
Step 5: Preview and Adjust
Ask for a preview first: still frames and a preview link, which do not spend credits or minutes.
Request changes by scene: "Scene 3 should be at night."
To change visuals only, ask Claude to redo pictures, which keeps the words, voiceover and timing.
Step 6: Render and Download
Render only when the preview is right. The finished job links to the MP4 and to the project in the Clippie editor.
Where it falls short: it needs a paid Clippie plan on top of Claude, and Clippie is not a timeline editor, so frame-precise cuts belong in a dedicated editor. Plans start at $19.99 a month, with discounts on longer billing; check the pricing page. Accounts are limited to 120 requests a minute and 5 running jobs.

Route 3: Claude Code With Remotion or HyperFrames
Route 3 uses Claude Code, Anthropic's coding agent, to write video as code. Remotion builds videos from React components; HyperFrames, an open-source HeyGen project, renders plain HTML and CSS to MP4. Both suit motion graphics, product explainers and animated data, not AI-illustrated story narration.
What each framework is:
Remotion: a React framework for programmatic video with a Studio preview. Its license is free for individuals, non-profits and for-profit companies with up to three employees; larger companies need a company license. Agent skills install with
npx skills add remotion-dev/skills.HyperFrames: "write HTML, render video," per its GitHub page. It supports GSAP, CSS, Lottie and Three.js animation, renders frames in headless Chrome and encodes with FFmpeg. It is Apache 2.0 licensed and ships a Claude Code plugin.
Remotion vs HyperFrames, briefly: HyperFrames' own README notes it needs no build step while Remotion uses React and a bundler, and it describes Remotion's cloud rendering as more mature.
Who this suits:
Developers and SaaS founders making feature explainers.
Channels built on kinetic text, charts or diagram animation.
Where it falls short: neither framework includes AI voice or image generation, so you bring those yourself, and expect to debug failed renders.

Example Prompts for Claude Video Workflows
Good Claude video prompts specify format, runtime, scene count, visual style and a review checkpoint. The examples below are real patterns you can paste and adapt, covering a stickman survival Short, connector commands and a code-based motion graphic, showing how the structure carries across routes.
Script prompts (any route):
60-second stickman survival Short: "Write a 60-second second-person survival script titled 'You Wake Up on a Raft With No Water.' First line is the hook. Eight scenes, each with one narration sentence and one visual note for a bare stick-figure style. Around 150 words. End with a question for the comments."
Connector prompts (Route 2):
"Using Clippie, create a 9:16 AI Story video from the script above with the Bare stickman template and a Dramatic voice style. Estimate the cost first and do not render until I approve the preview."
"Redo pictures for scenes 4 and 5 so the stickman is on the raft, looking down at a fin in the water. Keep the voiceover."
Code prompt (Route 3):
"Create a Remotion composition, 1080x1920 at 30fps, 20 seconds long, that animates the values in data.csv as a growing bar chart with large captions. Then render it to MP4."
For a stickman workflow that pulls research into Claude before scripting, see this walkthrough of connecting YouTube research data to Claude and building a stickman video.

Which Route Fits Your Channel
Pick the route by your skills and volume. Non-technical faceless creators should start with Route 1 and move to Route 2 when copying between apps slows them down. Developers and motion-graphics channels should choose Route 3. No route replaces a timeline editor for frame-precise work.
Quick matches:
New faceless Shorts channel, one video a day or less: Route 1.
Stickman, story or explainer series in batches: Route 2, since Claude can create, preview and revise projects in one chat.
Long-form 16:9 stickman or doodle explainers: Route 2 with a 16:9 template.
Product demos, animated charts, kinetic typography: Route 3.
Vlog edits, gameplay cuts or precise sound design: a timeline editor such as CapCut or DaVinci Resolve is the better choice.
Planning to automate a whole channel? Read our breakdown of what works and what fails in faceless YouTube automation before scaling.
Mistakes to Avoid When Making Videos With Claude
The most common mistakes are expecting Claude to render video itself, skipping previews, trusting unchecked facts, connecting unknown MCP servers and mass-producing near-identical uploads. Each one wastes credits or puts monetization at risk, and each is easy to avoid with a few habits.
Mistake #1: Expecting Claude to Output an MP4
Rendering always happens in a connected tool or in code, so choose your route first.
Mistake #2: Rendering Before You Preview
Rendering spends minutes and credits. Check the estimate and preview, then render once.
Mistake #3: Publishing Unchecked Scripts
Claude can state wrong facts confidently. Verify dates, figures and survival advice before a video goes live.
Mistake #4: Connecting Servers You Don't Trust
Anthropic advises connecting only to servers from organizations you trust, warns about prompt injection, and suggests caution with "Allow always" on tools.
Mistake #5: Ignoring Disclosure and Originality Rules
YouTube requires disclosure of realistic AI content and can apply labels automatically; clearly animated videos such as stickman stories don't need disclosure. TikTok and Instagram have their own rules. YouTube's inauthentic content policy also targets repetitive, mass-produced uploads, so vary formats and add substance.
FAQs
Can Claude make videos by itself?
No. Claude generates text and code, not video files. It can write scripts, scene lists and prompts, control a video platform through an MCP connector, or write Remotion or HyperFrames code that renders MP4s. The rendering always happens in that connected tool or framework, so you need one alongside Claude.
How do I make faceless YouTube videos with Claude?
Have Claude write a timed script with numbered scenes and visual notes, then turn it into video. You can paste it into a script-to-video tool, or connect a video platform's MCP server so Claude creates, previews and renders the project. Add an AI voice or your own narration, review everything, and upload.
How do I make stickman videos with Claude?
Ask Claude for a second-person script with one visual note per scene describing simple stick-figure action. Then generate it in a tool with a stickman look, such as an AI Story stickman template, either by pasting the script or through a connector. Keep the character description identical across scenes for consistency.
Which Claude plans support MCP connectors?
According to Anthropic's help center, custom connectors using remote MCP work on Free, Pro, Max, Ultra, Team and Enterprise plans. Free accounts are limited to one custom connector. On Team and Enterprise, an Owner adds the connector in organization settings, then members connect it from Customize, then Connectors.
Is Remotion or HyperFrames better for Claude Code?
It depends on your stack. Remotion uses React components, has a mature ecosystem and cloud rendering, and requires a company license for for-profit teams above three employees. HyperFrames uses plain HTML and CSS without a build step and is Apache 2.0 licensed. Web developers comfortable with React often start with Remotion.
Do I need to label videos made with Claude?
Labels depend on the visuals, not on Claude. YouTube requires disclosure for realistic AI-generated or altered content and can apply labels automatically. Using AI to write scripts does not need disclosure, and clearly unrealistic content such as animation is exempt. Check TikTok's and Instagram's own AI rules too.
What to Do Next
Make one short video end to end before building a whole workflow:
Today: decide your route using the matches above.
Next: paste the 60-second stickman survival prompt into Claude and edit the script until it reads well aloud.
Then: generate it in your chosen tool, or connect an MCP server and ask for a cost estimate and preview first.
Finally: review facts, captions and disclosure settings, then publish.
Try it in Clippie
Make faceless videos with Clippie
Type an idea or paste a script. Clippie writes, voices, illustrates and captions a video you never have to appear in.
See the faceless video formats