How to Use Flux Image Generator (Complete Guide 2026)
Learn how to use Flux models in Clippie AI to generate high-quality images with flexibility and control. This complete guide covers Flux Dev and Flux 2 models, including their differences, step-by-step tutorials, and a structured prompt framework.
Introduction
Generating high-quality AI images requires both flexibility and control, especially when working on creative projects, content, and visual assets. Flux models in Clippie AI are designed to give users a wide range of options depending on their needs.
The Flux family includes Flux Dev, Flux 2 Dev, Flux 2 Pro, Flux 2 Flex, and Flux 2 Max, each offering different levels of control and output quality. Flux Dev is the simplest version, supporting only aspect ratio selection, making it ideal for quick and straightforward image generation.
Flux 2 models are more advanced and include additional features such as resolution selection (0.5MP, 1MP, 2MP, and 4MP) and the ability to upload up to 4 reference images, giving you more control over style, composition, and consistency. These models are better suited for users who want more refined and customizable outputs.
Whether you need fast generation or more advanced control, Flux models provide a flexible solution for different creative workflows.
In this guide, you’ll learn how to use the Flux Image Generator in Clippie AI, along with a complete prompt framework to help you generate high-quality and consistent AI images.
Table of Contents
How to Use Flux Image Generator
Prompt Guide for Better Results
Prompt Examples
Common Mistakes to Avoid
FAQs
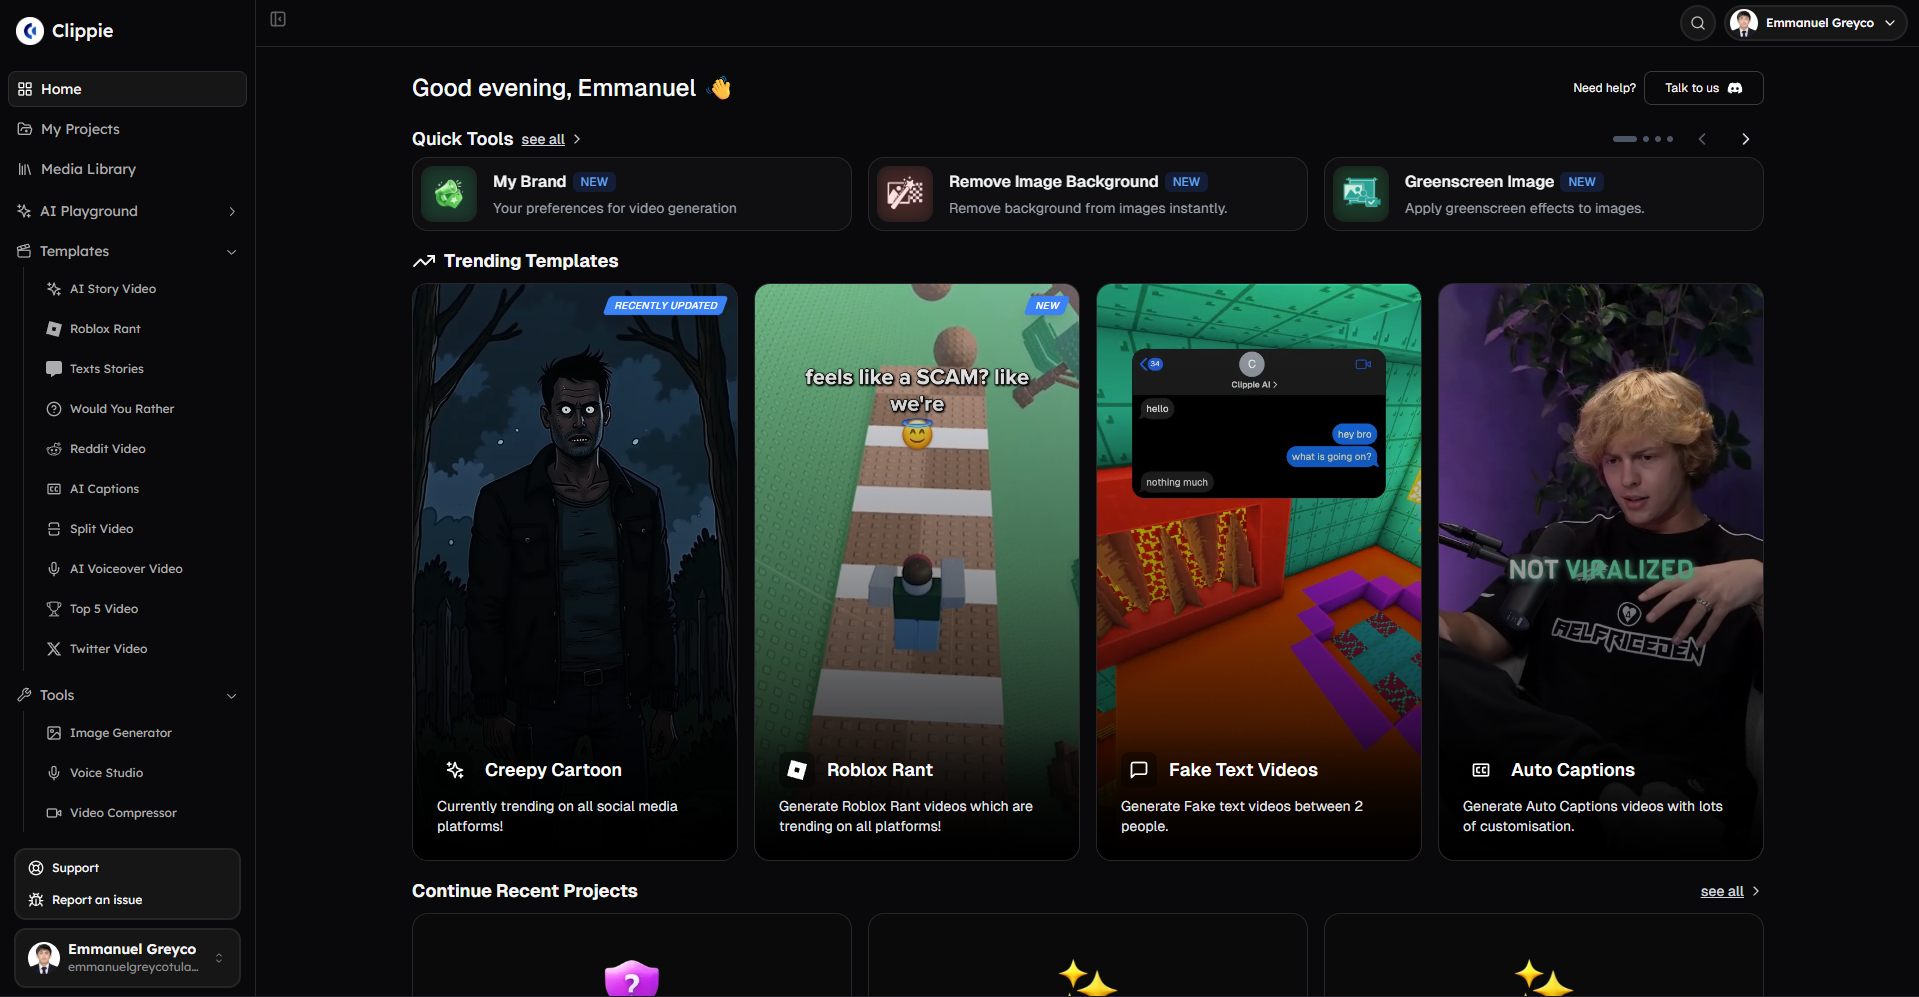
Step 1: Open the AI Image Generator in AI Playground
Start by accessing the image generation tool inside Clippie AI.
Go to AI Playground and select Image Generator.

Step 2: Generate Your Image with Flux Models
Create your image using a Flux model.
Select your preferred model (Flux Dev, Flux 2 Dev, Flux 2 Pro, Flux 2 Flex, or Flux 2 Max).

Type a detailed prompt describing the image you want to generate.
Example prompt: A highly detailed cinematic scene of a luxury sports car parked on a modern city street at night, neon lights reflecting on the car surface, wet pavement, dramatic lighting, shallow depth of field, realistic textures, high contrast, 4K quality
Choose your preferred aspect ratio.
For Flux 2 models, you can also: Select your preferred resolution (0.5MP, 1MP, 2MP, 4MP). Upload up to 4 reference images to guide the AI.
Click Generate to create your image.

Pro tip: Use reference images together with a structured prompt to get more consistent and accurate results.
Step 3: Download Your Image
Once your image has been generated:
Download your image.

Prompt Guide: How to Write High-Quality Prompts for Flux
Flux models offer more flexibility, which means your prompt quality has a big impact on the final output.
1. Use the Core Prompt Formula
Subject + Environment + Style + Lighting + Composition + Details + Quality
2. Subject (Main Focus)
Clearly define what the image is about.
Examples:
a futuristic city
a person working on a laptop
a sports car
3. Environment (Scene Context)
Add where the subject is.
Examples:
at night with neon lights
in a modern office
in a desert at sunset
4. Style (Visual Direction)
Flux models handle more complex styles well.
Examples:
cinematic
photorealistic
cyberpunk
futuristic
3D render
5. Lighting (Very Important)
Lighting improves depth and realism.
Examples:
neon lighting
dramatic shadows
soft ambient lighting
golden hour
6. Composition (Advanced Control)
Examples:
wide angle shot
close up shot
depth of field
blurred background
7. Details & Enhancements
Examples:
reflections
realistic textures
fog or particles
clean composition
8. Quality Keywords
Examples:
high quality
ultra realistic
4K
9. Optional: Adding Text in Images
You can include text in your image by specifying it clearly.
Examples:
text saying “WELCOME” at the top
small text at the bottom saying “2026”
Tips:
Keep text short
Specify placement
Avoid long sentences

10. Example of a Strong Prompt
A cinematic wide angle shot of a futuristic city skyline during sunset, glowing skyscrapers, warm orange and purple sky, soft ambient lighting, reflections on glass buildings, depth of field, ultra realistic textures, highly detailed, 4K quality
11. Bad vs Good Prompt
Bad:
“city”
Good:
A futuristic city at night with neon lights, reflections on wet streets, cinematic lighting, depth of field, ultra realistic, 4K
12. Reference Image Usage
Flux Dev → No reference image support
Flux 2 models → Support up to 4 reference images
13. Common Mistakes to Avoid
Writing vague prompts
Not including lighting
Overloading with too many styles
Not using reference images when needed
14. Pro Tip for Best Results
For maximum control and consistency: Use Flux 2 models + detailed prompts + reference images
Bonus: Get 1-on-1 Support in Our Discord Community
If you get stuck or want personalized help, join our Discord community. Our team offers 24/7 one-to-one support to help you go viral with your content.
Click me to join our discord community!
FAQs: Using Flux Image Generator
How do I write a good prompt for Flux to get high-quality images?
To get high-quality images with Flux, your prompt should clearly describe the subject, environment, style, lighting, and level of detail you want.
A simple structure that works well is: Subject + Environment + Style + Lighting + Composition + Details + Quality
For example: A cinematic wide angle image of a futuristic city at night, neon lights reflecting on wet streets, flying cars in the sky, dramatic lighting, depth of field, ultra realistic textures, 4K quality
Flux models are more flexible than most generators, so adding composition details like camera angle and depth of field can significantly improve results. Avoid vague prompts like “city” because they do not provide enough direction for the AI.
What is the difference between Flux Dev and Flux 2 models?
Flux Dev is designed for simple and fast image generation, while Flux 2 models (Dev, Pro, Flex, and Max) offer more advanced controls and higher-quality outputs.
Flux Dev supports:
prompt input
aspect ratio selection
Flux 2 models add:
resolution options (0.5MP, 1MP, 2MP, 4MP)
up to 4 reference images
better detail and consistency
If you want quick results, Flux Dev works well. If you need more control, higher image quality, and consistency across multiple images, Flux 2 models are the better choice.
How can I get more consistent results when generating images with Flux?
To improve consistency with Flux, you should combine structured prompts with reference images.
Here are the best practices:
use the same prompt structure across generations
keep subject and style consistent
upload reference images (Flux 2 models only)
describe lighting and composition clearly
Reference images are especially useful for maintaining:
character appearance
color palette
visual style
scene composition
Consistency improves significantly when both prompt and reference inputs are aligned.
Can I use reference images in Flux to improve quality?
Yes, but only for Flux 2 models.
Flux 2 models allow you to upload up to 4 reference images, which helps guide the AI in generating more accurate and consistent visuals.
Reference images help with:
matching a specific style
maintaining character consistency
improving composition
controlling overall visual output
Flux Dev does not support reference images, so results rely entirely on how well your prompt is written.
Related Blog Posts
How to Use Seedream Image Generator (Complete Guide 2026)
How to Use Nano Banana Image Generator (Complete Guide 2026)
How to Use Imagen Image Generator (Complete Guide 2026)
Click Me To Start Creating With Clippie AI Now!
Read more
Top 5 Opus Pro Alternatives for Clipping Creators: Tools Generating 100-200 Monthly Clips in 8-15 Hours in 2026
Top 5 Opus Pro alternatives clipping 2026: Why creators switch (clip accuracy, automation limits). Compare Clippie AI ($19.99-$69.99), Vizard, Repurpose.io, Descript, 2short.ai for AI clipping, batch workflows, 100-200 monthly clips in 8-15 hours.

How to Resize Videos for TikTok, Reels & YouTube Shorts: Complete 2026 Multi-Platform Optimization Guide
How to resize videos for TikTok/Reels/YouTube Shorts 2026: Correct aspect ratios (9:16, 4:5, 1:1), safe zones, quality preservation. Step-by-step resizing in CapCut, Premiere, VEED.io. Batch multi-platform workflows with Clippie AI for 100+ monthly videos.
Best Video Compressor Tools Without Losing Quality: Complete 2026 Guide for Creators
Best video compressor tools 2026 without quality loss: HandBrake, Adobe Media Encoder, Compressor, FFmpeg for 50-80% file reduction. H.265 vs H.264, optimal bitrate settings, platform-specific compression. Batch workflows with Clippie AI for 100+ videos.