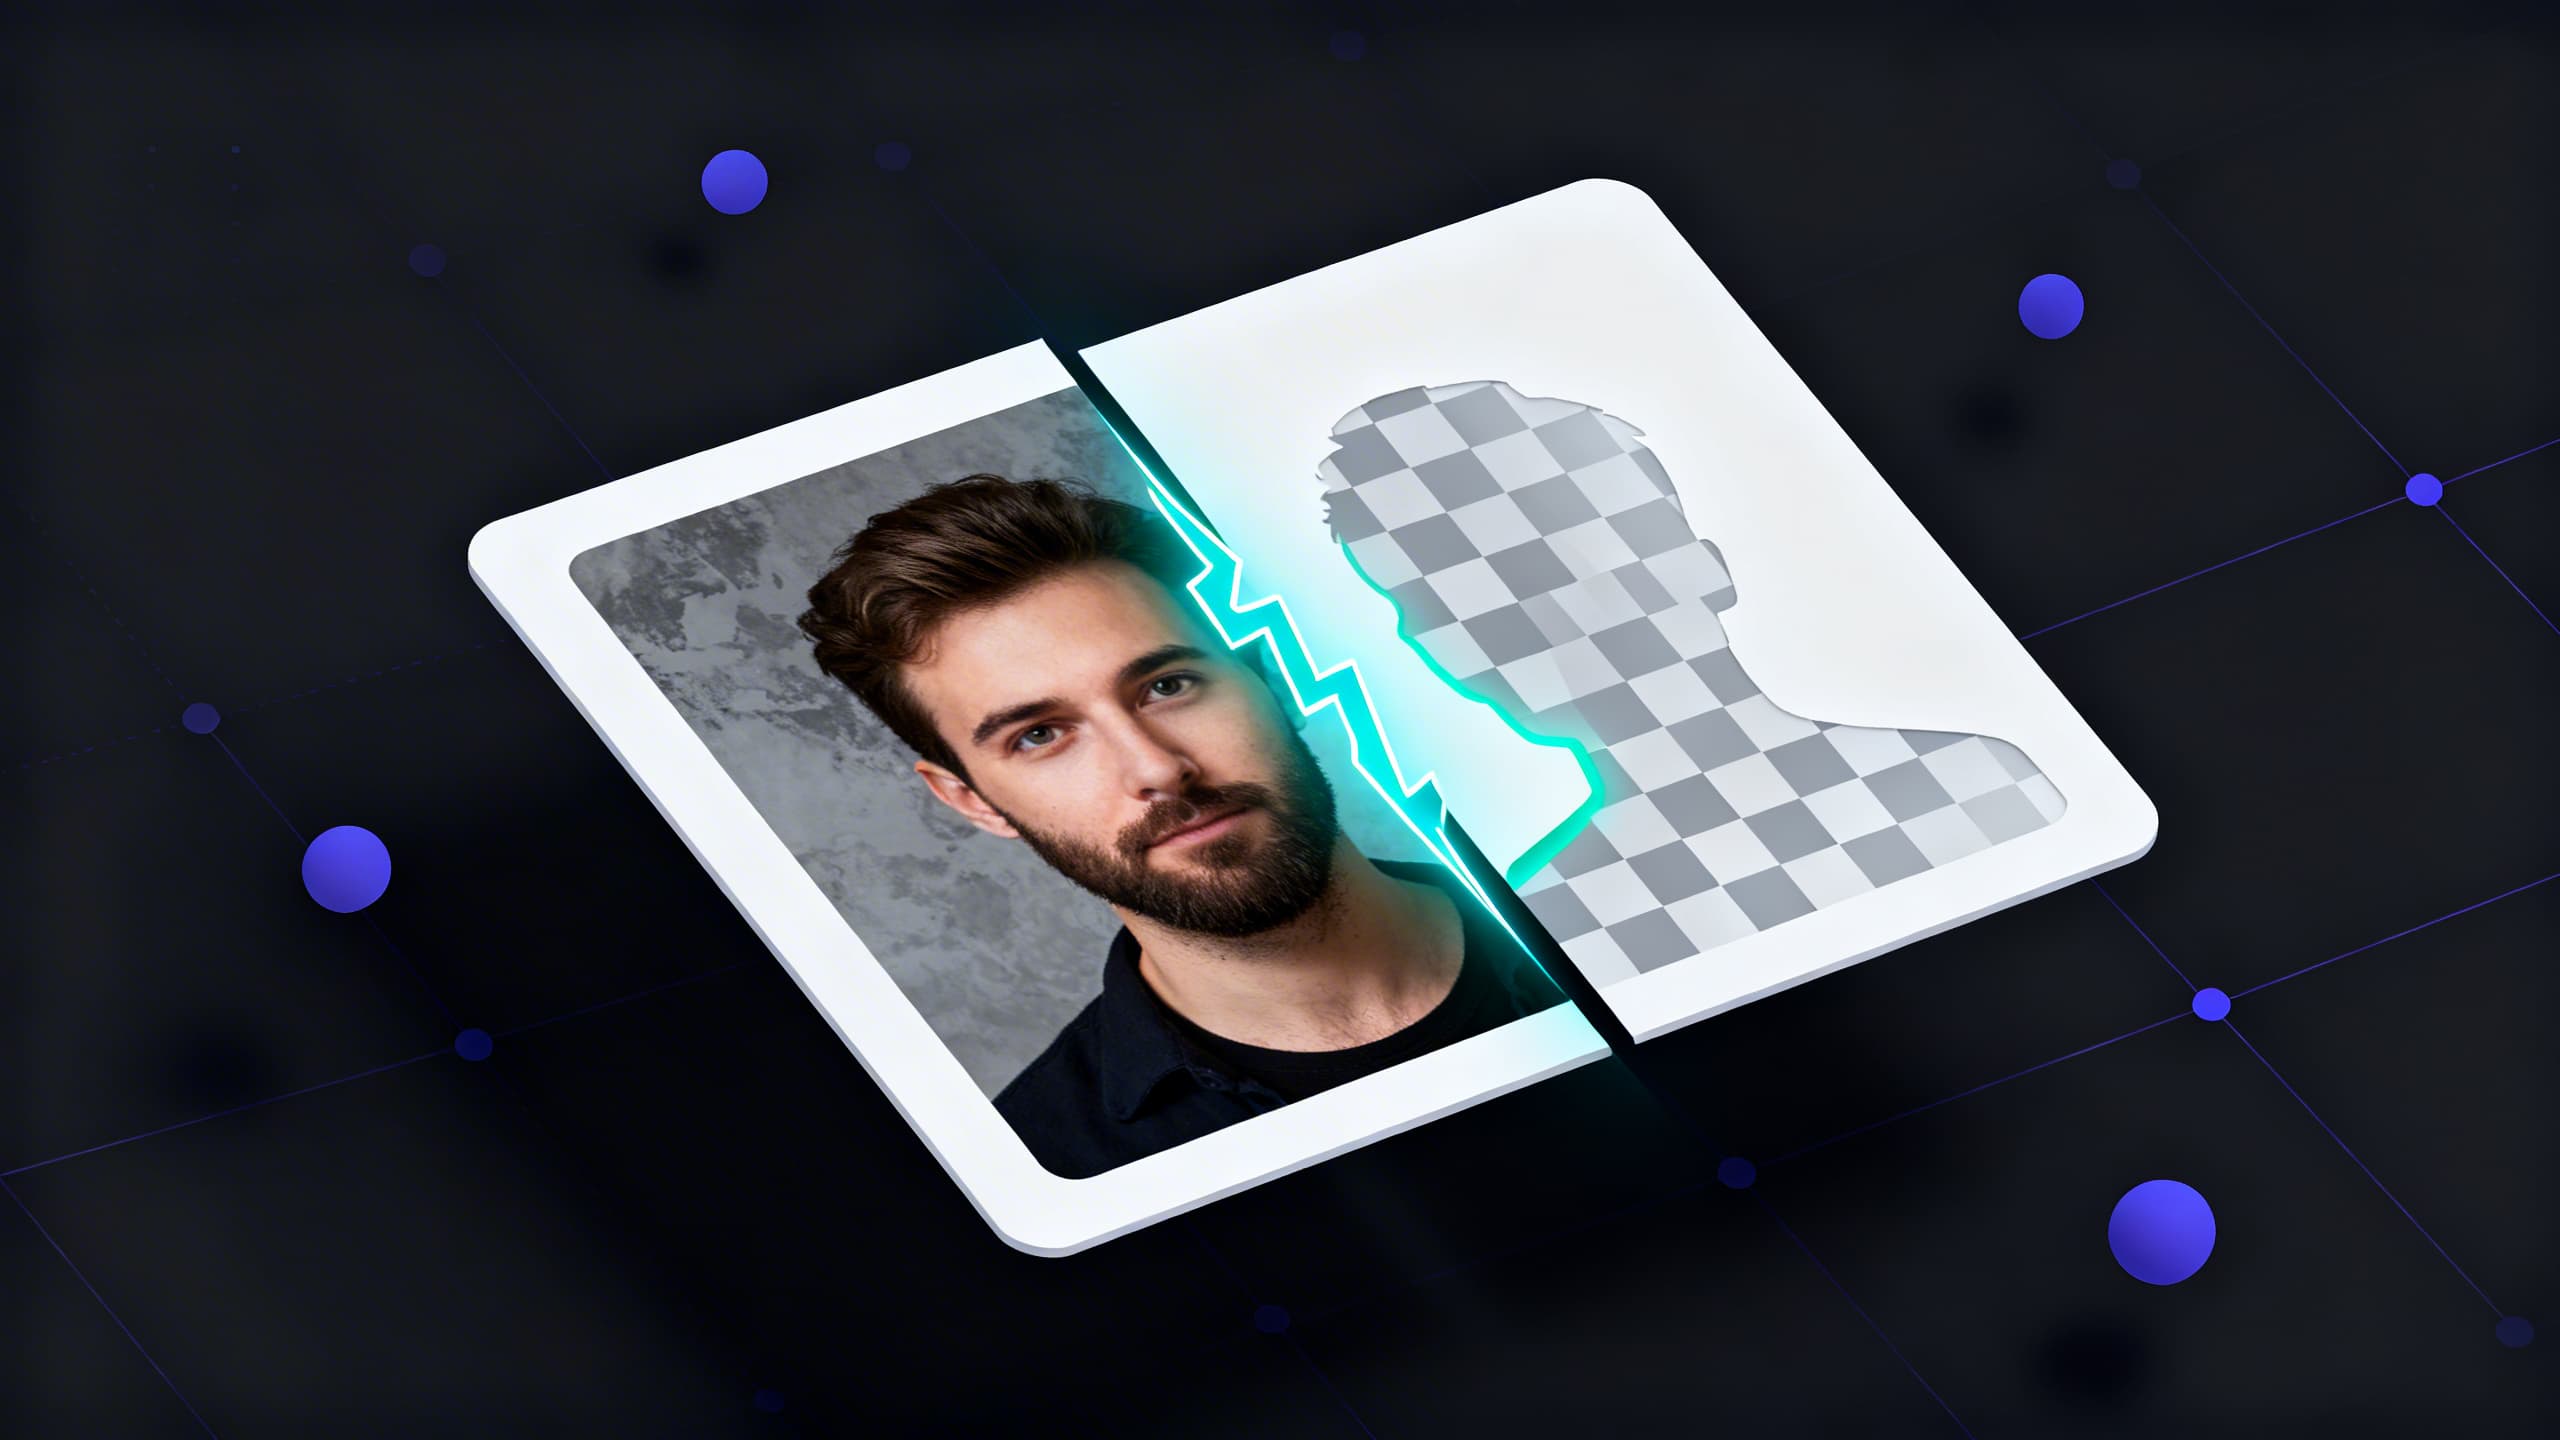
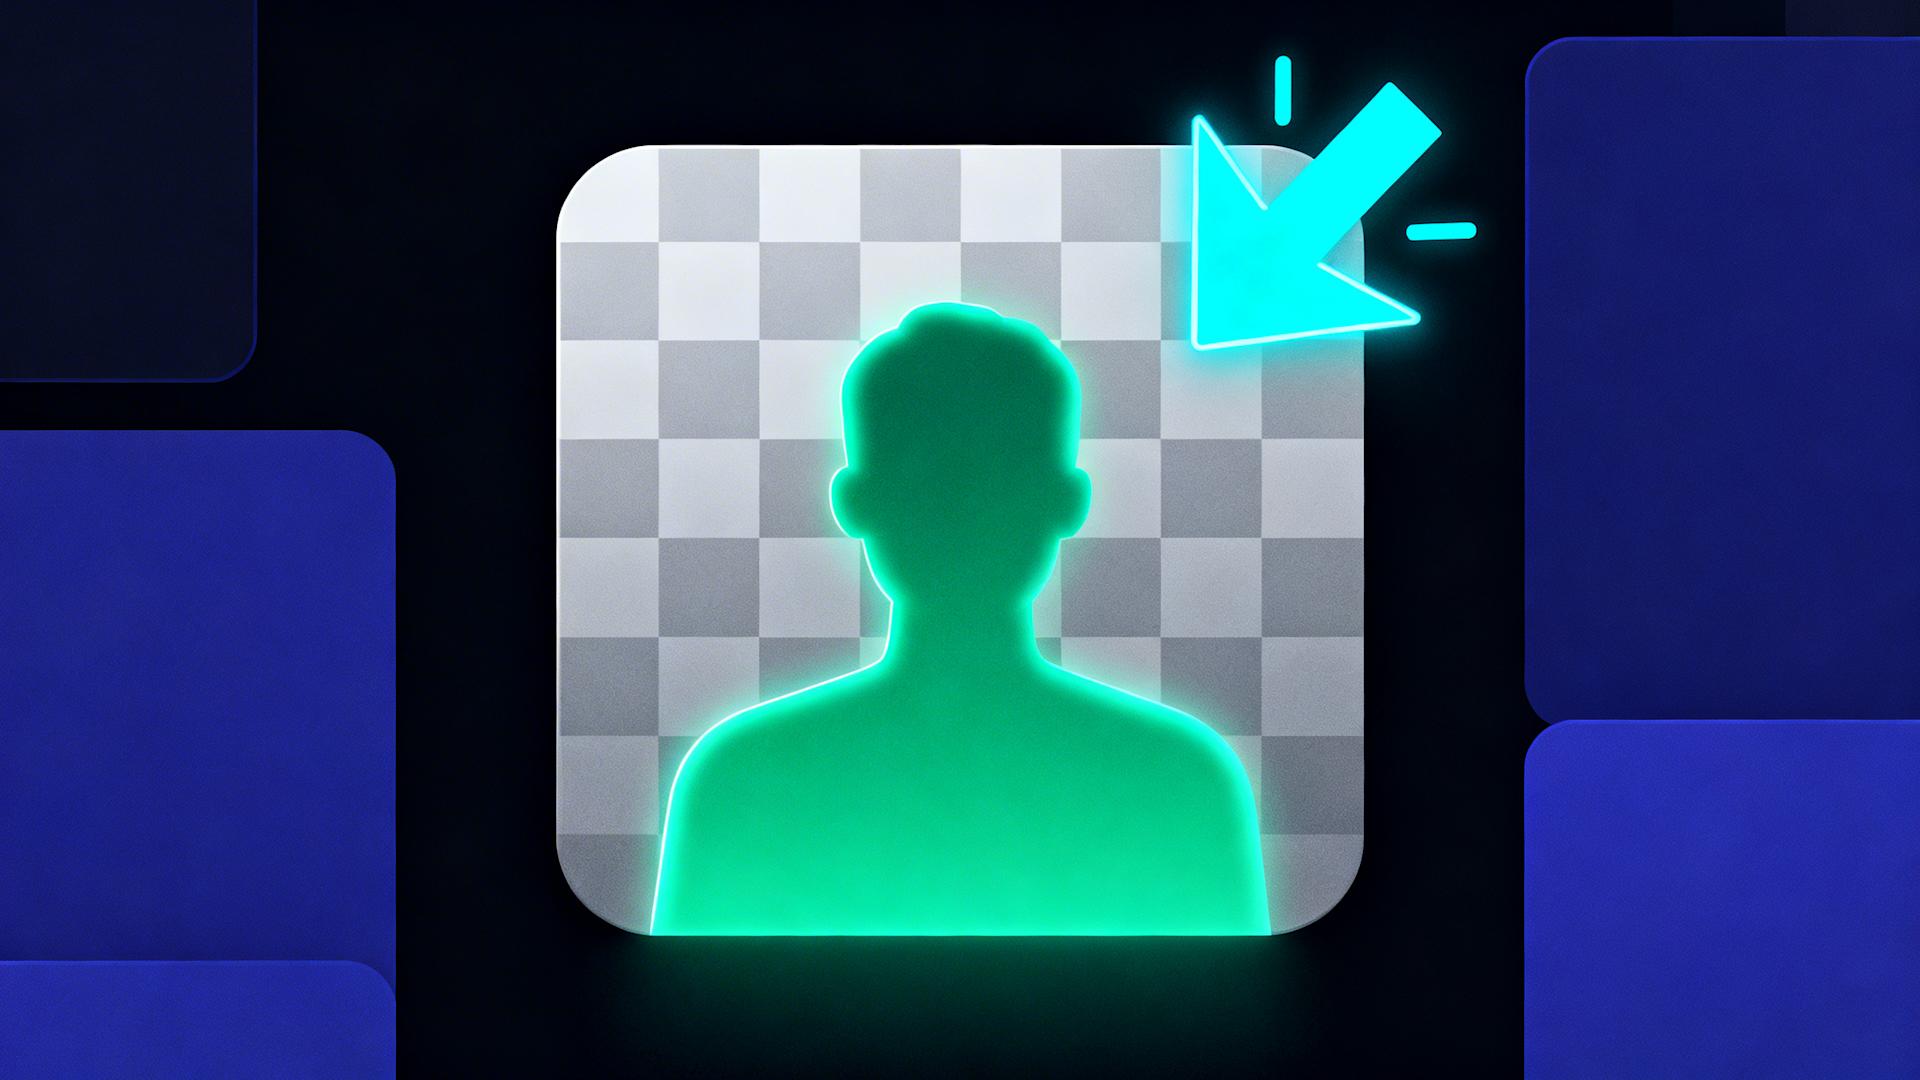
How to Remove Background from Photos Instantly (No Photoshop)
Remove background from photos instantly without Photoshop. Complete guide to AI background removal, product photo editing, transparent PNGs, clean cutouts & efficient workflows with Clippie AI.
If you're searching for how to remove background from photos without Photoshop, you're navigating the 2026 landscape where AI-powered background removal has democratized what once required professional photo editing expertise, eliminating the $20-$50/month Adobe subscription barrier, the 40-80 hour Photoshop learning curve mastering selection tools and layer masks, and the 10-30 minutes per image manual editing workflow (magic wand selections, refining edges, cleaning up artifacts) through semantic segmentation algorithms achieving 92-98% accuracy in 2-5 seconds. This comprehensive guide breaks down why background removal matters for different use cases (product photography requiring clean isolation for e-commerce listings, social media content needing eye-catching graphics without distracting backgrounds, professional headshots demanding polished presentation, thumbnail creation optimizing click-through rates), the technological evolution from traditional manual methods (Photoshop's pen tool tracing, color-based selection limitations, time-intensive precision work) to modern AI solutions (U2-Net and MODNet models understanding subject-background semantic differences), platform-specific workflows (Clippie AI's integrated approach vs. standalone tools requiring download-upload friction), optimization techniques for challenging scenarios (complex hair and fur, transparent objects, shadows and reflections, low-contrast edges), and systematic production enabling batch processing at scale, with real quality comparisons, format specifications, and efficient systems for creators and businesses requiring regular background removal.
Executive Summary: Photo background removal in 2026 serves five primary use cases with distinct quality and workflow requirements: product photography for e-commerce (white background standard requiring 95%+ edge accuracy, batch processing 50-500 images weekly, export to marketplace specifications), social media content creation (transparent backgrounds enabling graphic overlays, 10-30 images weekly for posts and stories, quick turnaround essential), professional headshots and portraits (subtle edge refinement maintaining natural appearance, occasional use for profiles and websites, highest quality expectations), thumbnail and marketing graphics (bold subject isolation maximizing visual impact, 5-20 weekly for YouTube, blogs, ads, CTR optimization critical), and video content production (background-removed elements as overlays in videos, 10-50 images per video project, integration with video workflow preventing file management friction). Modern AI tools achieve professional results (92-98% accuracy matching manual Photoshop work for standard subjects, 85-95% for complex hair/fur requiring minimal touch-up) in fraction of time (2-5 seconds automated processing vs. 10-30 minutes manual editing) and cost (free tiers adequate for occasional use, $10-$35/month unlimited processing vs. Photoshop $31.49-$54.99/month requiring expertise), with strategic tool selection depending on volume (standalone free tools for 1-10 monthly images, integrated platforms like Clippie AI for creators processing 50+ images weekly within broader content production workflows), quality needs (web/social media vs. print/professional), and workflow context (isolated task vs. integrated content creation).
Table of Contents
Why People Remove Photo Backgrounds
Traditional Methods vs AI Background Removal
Removing Backgrounds from Product Photos with Clippie AI
Social Media & Thumbnail Background Removal
How to Get Transparent PNG Backgrounds
Best Image Types for Clean Cutouts
FAQs About Photo Background Removal
1. Why People Remove Photo Backgrounds
The Five Primary Use Cases
Use Case 1: E-commerce product photography
The requirement:
Clean white background (Amazon, eBay, Etsy standard)
Professional appearance (isolated product, no distractions)
Consistent across catalog (uniformity signals brand professionalism)
Why background removal essential:
Marketplace compliance: Amazon requires pure white background (RGB 255,255,255) for main product image
Conversion optimization: Clean backgrounds increase conversion 20-35% (product clearly visible, professional presentation builds trust)
Brand consistency: Uniform backgrounds across 50-500 product SKUs (cohesive catalog appearance)
Volume and frequency:
Small businesses: 10-50 products monthly (new inventory, seasonal updates)
Medium e-commerce: 100-300 products monthly (growing catalog)
Large retailers: 500-5,000 products monthly (massive catalogs, constant updates)
Quality expectations:
Edge accuracy: 95%+ (clean product outline, no background remnants)
Format: PNG with transparency (for placement on white background)
Resolution: High-res for zoom features (2000×2000+ pixels typical)
Traditional approach:
Hire photographer with studio setup ($500-$2,000 per product photoshoot)
Or: Photograph products then manually edit each (10-30 minutes per image in Photoshop)
Cost: $5-$50 per product image (professional editing service) or significant time investment
AI approach:
Photograph products on any background (kitchen table, office desk, lighting still matters but background irrelevant)
Batch upload to AI tool (50-100 images simultaneously)
Automated background removal (2-5 seconds per image)
Download white background versions
Cost: $0-$20 monthly unlimited processing (vs. $5-$50 per image manual)
Time: 10 minutes for 50 images (vs. 500-1,500 minutes manual)
Use Case 2: Social media content creation
The requirement:
Transparent backgrounds (for overlay on graphics, branded templates)
Eye-catching visuals (subject pops against clean/colorful backgrounds)
Quick turnaround (daily posting demands fast production)
Why background removal essential:
Graphic flexibility: Remove subject from photo, place on any background (gradients, patterns, branded colors)
Visual hierarchy: Isolated subject draws eye (maximizes engagement, improves scroll-stopping power)
Template compatibility: Transparent PNGs work with Canva, Adobe Express, social media design tools
Volume and frequency:
Personal brands: 5-15 images weekly (Instagram posts, stories, LinkedIn graphics)
Social media managers: 20-50 images weekly (multiple clients, platforms)
Agencies: 100-300 images weekly (dozens of client accounts)
Quality expectations:
Edge quality: 85-95% acceptable (social media compression hides minor imperfections)
Format: PNG with transparency (layering in design tools)
Resolution: Web-optimized (1080×1080 to 1920×1080, high-res unnecessary for social)
Workflow integration:
Remove background from photo (subject isolated)
Import to Canva/Figma/Adobe Express (place on branded template)
Add text, graphics, CTAs (complete social post)
Export and schedule (Instagram, LinkedIn, Facebook, TikTok)
AI advantage:
Instant background removal (no context-switching to Photoshop)
Batch processing (remove backgrounds from 10 photos simultaneously while designing in Canva)
Time savings: 5-10 minutes for 10 images (vs. 100-300 minutes manual Photoshop work)
Use Case 3: Professional headshots and portraits
The requirement:
Natural edge quality (hair, clothing edges look realistic, not "cutout")
Polished backgrounds (solid colors, gradients, or blur replacing messy originals)
Professional presentation (LinkedIn, company websites, speaker bios, media kits)
Why background removal essential:
Consistency: Team headshots with uniform backgrounds (even if photographed in different locations, different times)
Flexibility: Change background without re-shooting (update brand colors, seasonal themes)
Cost: One photoshoot, multiple background variations (vs. multiple shoots in different locations)
Volume and frequency:
Individuals: 1-5 images annually (updating LinkedIn, website, dating profiles)
Small businesses: 5-20 images (team photos, executive headshots)
Corporations: 50-500 images (entire workforce headshots for intranet, directories)
Quality expectations:
Edge accuracy: 95-99% (professional use demands precision)
Hair/fur handling: Excellent (natural, not overly smoothed or rough)
Format: PNG for design flexibility, JPG for final use
Resolution: Medium to high (1200×1600 to 2400×3200)
Common workflow:
Photograph person against any background (office wall, home, outdoor)
Remove background (isolate person)
Add professional background (corporate blue gradient, soft blur, solid color matching brand)
Optional: Minor retouching (skin smoothing, color correction)
Export for use (website upload, LinkedIn, business cards)
Use Case 4: Thumbnail and marketing graphics
The requirement:
Bold subject isolation (maximizes visual impact, improves CTR)
Flexibility for text overlay (transparent backgrounds don't compete with text)
High-contrast presentation (subject pops against vibrant backgrounds)
Why background removal critical:
Click-through rate: Clean thumbnails with isolated subjects achieve 15-40% higher CTR (YouTube, blogs, ads)
Design control: Place subject anywhere on graphic (not constrained by original photo background)
A/B testing: Test multiple background colors/styles (find what converts best)
Volume and frequency:
YouTubers: 4-12 thumbnails monthly (1-3 videos weekly)
Bloggers: 8-20 images monthly (2-5 blog posts weekly needing featured images)
Advertisers: 20-100 images monthly (ad creative variations, A/B testing)
Quality expectations:
Edge quality: 90-95% (thumbnails viewed small, minor imperfections invisible)
Visual impact: High (bold, clear subject)
Format: PNG for design, JPG for final export
Resolution: Medium (1280×720 to 1920×1080, thumbnail size)
Typical workflow:
Photograph person with expressive face/gesture (excitement, surprise, curiosity)
Remove background (isolate person)
Place on vibrant background (bright colors, high contrast)
Add bold text overlay (title, hook, CTA)
Test variations (different backgrounds, subject positions)
Export and upload (YouTube, blog CMS, ad platforms)
Use Case 5: Video content production
The requirement:
Background-removed elements as video overlays (product shots in videos, graphics, talking head cutouts)
Batch processing (10-50 images per video project)
Workflow integration (avoid download/re-upload friction)
Why background removal essential:
Visual variety:
Insert product images into videos (demonstrations, reviews, tutorials)
Green screen alternative:
Remove background from person without green screen setup
Motion graphics: Animate background-removed subjects (moving across screen, zoom effects)
Volume and frequency:
Video creators: 10-30 images per video (multiple videos monthly)
Agencies: 50-200 images per client video project
Marketing teams: 100-500 images monthly (ongoing video campaigns)
Quality expectations:
Edge quality: 85-95% (video motion and compression hide imperfections)
Consistency: Good (if subject appears multiple times in video)
Format: PNG with transparency (for video editor layering)
Resolution: Video-matched (1080p or 4K depending on video output)
Workflow challenge:
Traditional: Download images → Upload to background remover → Download PNGs → Re-upload to video editor (4 separate steps, file management nightmare)
Integrated: Upload images directly to video creation platform → Toggle background removal → Use in video (1 step, zero file management)
Time comparison:
Standalone background removal tool: 20 images × 2 minutes (download, process, re-upload) = 40 minutes
Integrated workflow (Clippie AI): 20 images × 5 seconds (toggle, done) = 100 seconds (1.67 minutes)
Time savings: 38 minutes per video project (96% reduction)

The ROI Calculation
For e-commerce (100 products monthly):
Manual Photoshop editing:
Time: 100 products × 20 minutes = 2,000 minutes (33.3 hours)
Labor cost: 33.3 hours × $25/hour = $832.50 monthly
Or outsource: 100 products × $10 per image = $1,000 monthly
AI background removal:
Time: 100 products × 30 seconds = 50 minutes (0.83 hours)
Tool cost: $20/month unlimited processing
Labor cost: 0.83 hours × $25/hour = $20.75
Total: $40.75 monthly
Savings: $791.75-$959.25 monthly (95-96% cost reduction)Annual savings: $9,501-$11,511
For content creators (50 images monthly for social media + videos):
Manual Photoshop editing:
Time: 50 images × 15 minutes = 750 minutes (12.5 hours monthly)
Opportunity cost: 12.5 hours creating content vs. editing = delayed posting, fewer videos, less growth
AI background removal:
Time: 50 images × 10 seconds = 500 seconds (8.3 minutes monthly)
Tool cost: $0-$20/month (depending on volume tier)
Time reclaimed: 12.4 hours monthly (99% reduction)Value: 12.4 hours → 3-4 additional videos monthly → 15-30% more content output → faster channel growth
2. Traditional Methods vs AI Background Removal
Traditional Manual Methods (Photoshop Era: 1990-2020)
Method 1: Magic Wand / Quick Selection Tool
How it works:
Click on background (tool selects similar colors)
Refine selection (expand, contract, feather edges)
Delete background (or create layer mask)
Advantages:
Fast for simple backgrounds (solid colors, high contrast)
Built into Photoshop (no additional tools needed)
Limitations:
Fails on complex backgrounds: Busy scenes with many colors (tool can't distinguish subject from background)
Poor edge quality: Jagged edges, color fringing (especially on hair, fur)
Requires manual refinement: Initial selection rarely perfect (15-30 minutes per image cleaning up)
Skill requirement: Intermediate (understand selections, layers, masks)
Time investment: 10-20 minutes per image (simple subjects), 30-60 minutes (complex)
Method 2: Pen Tool (Manual Tracing)
How it works:
Manually trace subject outline with pen tool (creating vector path)
Convert path to selection
Create layer mask (subject isolated)
Advantages:
Precision: Complete control over every edge point (perfect outlines possible)
Works on any background: Doesn't depend on color contrast (can isolate subject on similarly-colored background)
Limitations:
Extremely time-consuming: 30-90 minutes per image (depends on subject complexity, simple product vs. person with flowing hair)
High skill requirement: Steep learning curve (pen tool mastery takes 20-40 hours practice)
Tedious: Placing hundreds of anchor points, adjusting curves (mentally exhausting)
Skill requirement: Advanced (pen tool proficiency essential)
Time investment: 30-90 minutes per image (even for experienced users)
Method 3: Channel Masks (Advanced Technique)
How it works:
Analyze RGB channels (find channel with best subject-background contrast)
Duplicate channel, adjust levels (maximize contrast)
Convert to selection, refine edges
Create layer mask
Advantages:
Excellent for hair/fur: Best manual method for complex edges
Professional results: With expertise, matches or exceeds AI quality
Limitations:
Expert-level technique: Requires deep Photoshop knowledge (95% of users never learn this)
Still time-intensive: 20-40 minutes per image (faster than pen tool but slower than AI)
Requires good source material: Needs sufficient contrast in at least one channel
Skill requirement: Expert (advanced Photoshop mastery)
Time investment: 20-40 minutes per image
Method 4: Green Screen Photography
How it works:
Photograph subject against green (or blue) screen
Use chroma key selection (color-based removal)
Replace green with transparency
Advantages:
Clean edges: When done properly, excellent subject isolation
Batch efficiency: Photograph 10-20 products on green screen, batch remove backgrounds
Limitations:
Requires studio setup: Green screen backdrop ($50-$500), lighting ($200-$1,000), space
Color spill issues: Green light reflects onto subject (creates green fringe requiring cleanup)
Not portable: Can't use for photos already taken, travel photography, impromptu shots
Setup time: 15-30 minutes to set up and light properly
Skill requirement: Photography knowledge + moderate Photoshop skills
Time investment: 30-60 minutes setup + 5-10 minutes per image editing
Cost: $250-$1,500 initial investment (green screen, lights, stands)

Modern AI Background Removal (2020-2026)
The technology: Semantic segmentation
How it works:
AI model analyzes image (U2-Net, MODNet, or similar architecture)
Identifies what is "subject" vs. "background" (semantic understanding, not just color difference)
Segments image into layers (subject foreground, background)
Generates alpha matte (transparency map with soft edges)
Outputs PNG (subject with transparent background)
Why AI succeeds where color-based tools fail:
Color-based tools (Magic Wand):
Assumption: Subject and background are different colors
Failure case: Person wearing green shirt on green grass (tool can't distinguish)
Method: Pixel color comparison (simple, limited)
AI semantic segmentation:
Understanding: "This is a person" (recognizes human shape, posture, features)
Success case: Person in green on green grass (AI knows person shape distinct from grass)
Method: Deep learning trained on millions of labeled images (complex, sophisticated)
Accuracy benchmarks (2026 state-of-the-art):
Standard subjects (person, product on simple background):
AI accuracy: 95-98% (matches expert manual Photoshop work)
Processing time: 2-5 seconds
Manual equivalent time: 15-30 minutes
Complex subjects (long hair, fur, transparent objects):
AI accuracy: 85-95% (good, may need minor manual touch-up)
Processing time: 3-8 seconds
Manual equivalent time: 30-60 minutes
Very complex (glass, reflections, fine detail on busy background):
AI accuracy: 70-85% (usable starting point, requires refinement)
Processing time: 3-8 seconds
Manual equivalent time: 60-120 minutes
Edge quality comparison:
Photoshop Magic Wand:
Edge type: Hard, jagged (aliasing visible)
Hair/fur: Poor (misses fine strands, creates halo)
Feathering: Manual adjustment needed
Photoshop Pen Tool (expert user):
Edge type: Vector-precise (smooth curves)
Hair/fur: Varies (depends on technique, can be excellent with channel masks)
Feathering: Manual control (perfect if skilled)
AI background removal (2026):
Edge type: Soft, natural (anti-aliased automatically)
Hair/fur: Very good (preserves fine detail, semi-transparent edges)
Feathering: Automatic optimization (context-aware edge softness)
Quality verdict: AI matches expert Photoshop work for 80-90% of use cases, surpasses Magic Wand/Quick Selection for 95%+ of use cases
The Accessibility Revolution
Photoshop requirements:
Cost:
Photoshop subscription: $31.49/month (Photography plan) or $54.99/month (All Apps)
Annual: $377.88-$659.88
Learning curve:
Basic competency: 10-20 hours (tutorials, practice)
Intermediate skill: 40-80 hours (understanding layers, masks, advanced selections)
Expert level: 200-500 hours (mastering pen tool, channel masks, advanced techniques)
Accessibility barrier: High (cost + time investment prohibitive for casual users, small businesses, hobbyists)
AI background removal requirements:
Cost:
Free tiers: Available (Remove.bg, Clippie AI within subscription, others)
Paid unlimited: $10-$35/month typical
Learning curve:
Basic use: 2-5 minutes (upload image, download result)
Advanced features: 10-20 minutes (batch processing, refinement tools)
Accessibility: Universal (anyone with internet access, no expertise required)
The democratization effect:
Before AI (2019):
Professional background removal: Requires Photoshop expertise OR outsourcing ($5-$50 per image)
Small business owner wanting clean product photos: Hire photographer/editor ($500-$2,000) or spend weeks learning Photoshop
Result: Barrier to entry high (many give up, use sub-par product photos, lose sales)
After AI (2026):
Professional background removal: Upload image, download result (2-5 seconds, no expertise)
Small business owner: Process 50 products in 10 minutes ($0-$20 monthly)
Result: Democratized access (professional-quality product photography accessible to everyone)
Market impact:
Freelance photo editors: Demand for basic background removal declined 60-70% (2020-2026)
Remaining demand: Complex retouching, creative compositing, high-end work (AI can't replace)
New market: AI-assisted workflows (editors using AI for speed, manual refinement for perfection, hybrid approach 5-10x faster than pure manual)

3. Removing Backgrounds from Product Photos with Clippie AI
The E-commerce Product Photography Workflow
Traditional product photography workflow (without integrated tools):
Step 1: Photograph products (2-4 hours for 20 products)
Setup: Lighting, backdrop, camera/phone positioning
Shooting: Multiple angles, detail shots per product
Result: 60-100 raw product images (20 products × 3-5 images each)
Step 2: Select best images (30-60 minutes)
Review all photos (identify best angle, lighting, focus for each product)
Cull: 60-100 images → 20-30 final selections
Step 3: Transfer to computer (5-10 minutes)
Export from camera/phone
Organize in folders
Step 4: Upload to background removal tool (10-15 minutes)
Open Remove.bg or similar (standalone tool)
Upload images one-by-one or batch
Wait for processing
Step 5: Download processed images (10-15 minutes)
Download PNGs (one-by-one or ZIP)
Extract, organize
Step 6: Add white background for marketplace compliance (30-60 minutes)
Open Photoshop or design tool
Create white background layer
Place transparent PNG on white
Export as JPG (marketplace format)
Repeat for 20-30 images
Step 7: Upload to e-commerce platform (30-45 minutes)
Log into Shopify/Amazon/Etsy
Upload images to respective product listings
Add alt text, metadata
Total time: 5-7.5 hours for 20 products (15-22.5 minutes per product)
Clippie AI integrated workflow:
Step 1: Photograph products (2-4 hours, same)
Step 2: Upload directly to Clippie AI (5 minutes for 20 products)
Batch upload all selected images (drag-and-drop)
Clippie AI imports to media library
Step 3: Batch background removal (1 minute)
Select all product images in media library
Click "Remove Background" (batch action)
Clippie AI processes simultaneously (2-5 seconds per image, parallel processing)
Step 4: Add white background (automated, 2 minutes)
Select background color: White (RGB 255,255,255)
Apply to all (batch action)
Export as JPG with white background (marketplace-ready format)
Step 5: Download marketplace-ready images (3 minutes)
Bulk download (ZIP file with all processed images)
Or: Direct integration with Shopify/WooCommerce (upload directly from Clippie AI, future feature)
Total time: 2.5-4.2 hours for 20 products (7.5-12.6 minutes per product)
Time savings: 2.5-3.3 hours (40-50% reduction)
What makes integrated workflow faster:
No tool switching: Everything in one platform (photography review, background removal, export)
Batch operations: Process 20 images simultaneously (vs. individually)
No intermediate files: Direct processing (no download/re-upload between steps)
Step-by-Step: Product Background Removal in Clippie AI
Scenario: Small business owner with 15 products needing white background for Amazon
Step 1: Upload product images (2 minutes)
Open Clippie AI
Create new project: "Amazon Product Photos - [Month]"
Click "Add Media" or drag-and-drop
Select all 15 product images from computer
Wait for upload (15 images × 2-5 MB each = 30-75 MB, uploads in 30-90 seconds on typical connection)
Step 2: Batch background removal (30 seconds)
In media library, select all uploaded product images (checkbox or Ctrl+A)
Look for "Batch Actions" menu or "Edit Selected"
Click "Remove Background"
Clippie AI processes all 15 simultaneously
Progress bar shows completion status
Processing time: 30-45 seconds (AI working on all images in parallel)
Step 3: Review results (3-5 minutes)
Preview each image with removed background
Check edge quality:
Product edges clean (no background remnants)
Shadows preserved or removed (depending on preference, Amazon allows drop shadows if natural)
Complex areas handled well (handles, curves, fine details)
For any images needing adjustment:
Click image → "Refine Edges" tool
Brush to include/exclude areas (manual touch-up if needed)
Typically 0-3 images out of 15 need refinement (AI accuracy 92-98%)
Step 4: Add white background for Amazon compliance (1 minute)
With all images still selected, click "Background Options"
Choose "Solid Color"
Set color: White (hex #FFFFFF or RGB 255,255,255)
Click "Apply to All"
Result: All products now on pure white background (Amazon requirement met)
Step 5: Export marketplace-ready images (2 minutes)
Select all processed images
Click "Export" or "Download"
Choose settings:
Format: JPG (Amazon accepts PNG but JPG reduces file size, faster page loads)
Quality: 90-95% (balances quality and file size)
Size: 2000×2000 pixels minimum (Amazon recommendation for zoom feature)
Click "Download All"
Clippie AI creates ZIP file with all images
Download and extract (all images named with original filenames or customizable naming)
Step 6: Upload to Amazon Seller Central (15-30 minutes)
Log into Amazon Seller Central
Navigate to each product listing
Upload processed image as main product image
Add alt text (SEO and accessibility)
Save listing
Total time: 23.5-38.5 minutes for 15 products (1.57-2.57 minutes per product)
Comparison to manual Photoshop:
Manual: 15 products × 20 minutes = 300 minutes (5 hours)
Clippie AI: 38.5 minutes
Time savings: 261.5 minutes (4.4 hours, 87% reduction)
Advanced Product Photography Features
Feature 1: Shadow preservation (natural vs. drop shadow vs. removed)
The challenge:
Natural shadows add depth (products look three-dimensional, realistic)
But: Shadows on original background don't work on white background (look weird, unnatural)
Solution: AI must distinguish product from shadow, preserve shadow, remove background
Clippie AI options:
Option A: Preserve natural shadow
AI keeps shadow cast by product (ground shadow, contact shadow)
Good for: Products photographed on white/light surface (shadow already natural on light background)
Result: Product + shadow on transparent background → Placed on white = realistic presentation
Option B: Remove all shadows
AI removes both background and shadows (pure product isolation)
Good for: Adding artificial drop shadow (consistent shadow across all products regardless of lighting)
Result: Product only → Add custom drop shadow in Clippie AI (control angle, softness, opacity)
Option C: Generate drop shadow (professional catalog standard)
Clippie AI creates artificial shadow (soft, realistic, customizable)
Settings: Shadow opacity (20-60%), blur radius (10-30 pixels), offset (vertical and horizontal)
Good for: Uniform catalog appearance (all products identical shadow)
Result: Professional consistency (looks studio-photographed even if shot on kitchen table)
Example:
Product: Coffee mug photographed on kitchen table
Original: Harsh shadow at 2 PM, background cluttered
Step 1: Remove background (Clippie AI isolates mug)
Step 2: Remove original shadow (eliminate harsh lighting)
Step 3: Add drop shadow (soft, centered, 30% opacity, 20px blur)
Result: Professional studio appearance (no one knows it was kitchen table)
Feature 2: Batch consistency (color correction, size normalization)
The challenge:
Products photographed at different times (lighting varies, morning vs. evening, sunny vs. cloudy)
Catalog needs consistency (all products same white balance, brightness, saturation)
Clippie AI solution:
Auto color correction:
Analyzes all product images in batch
Identifies white balance discrepancies (some images too warm, some too cool)
Normalizes white balance (consistent color temperature across catalog)
Brightness normalization:
Some products overexposed (too bright, detail blown out)
Others underexposed (too dark, muddy)
Clippie AI adjusts to consistent brightness (all products equally visible)
Size and position normalization:
Products different physical sizes (small phone case vs. large backpack)
Need consistent canvas (all images 2000×2000 px for Amazon)
Clippie AI scales products proportionally (small products ~40% of canvas, large ~80%, consistent visual weight)
Result:
50 products photographed over 3 months, different lighting conditions → Processed catalog looks uniformly shot in single professional session
Feature 3: Multi-angle batch processing
The scenario:
Each product needs 5-7 images (front, back, left, right, top, detail shots)
20 products × 6 images = 120 images to process
Traditional approach:
Upload 120 images to background remover
Process individually or batch (regardless, 120 files to manage)
Download 120 PNGs
Organize by product (manually sort into folders, time-consuming, error-prone)
Clippie AI approach:
Smart organization:
Upload all 120 images
Tag images by product (select Product 1 images, tag "Product-001", repeat for all 20 products)
Process all (batch background removal)
Export by product (Clippie AI creates folders per product, all angles organized)
Benefit:
Automatic organization (no manual file sorting)
Error prevention (guaranteed all angles for Product 1 in Product-001 folder)
Time savings: 30-60 minutes (organizing 120 files manually vs. automatic)

4. Social Media & Thumbnail Background Removal
Social Media Graphics Workflow
Use case: Instagram content creator posting 4x weekly
Content needs:
4 feed posts weekly (product photos, lifestyle images, quotes on backgrounds)
7 story frames daily (behind-the-scenes, polls, quick tips)
Background removal need: 10-15 images weekly (subject isolation for graphic templates)
Traditional workflow (Photoshop + Canva):
Monday content creation (3 hours):
Select images for week (15 minutes)
Review photo library (phone, computer)
Choose 12 images (4 feed posts + 8 stories)
Remove backgrounds in Photoshop (90 minutes)
Open Photoshop
Import first image → Select subject → Refine edges → Export PNG
Repeat 12 times (average 7-8 minutes per image for decent quality)
Design graphics in Canva (60 minutes)
Open Canva → Instagram Post template
Import background-removed PNG
Place on branded background
Add text overlay, branding elements
Duplicate for variations (4 feed posts + 8 stories = 12 total designs)
Export and schedule (15 minutes)
Download all designs from Canva
Upload to Later/Buffer (scheduling tool)
Schedule throughout week
Total weekly time: 3 hours (not including photography, caption writing)
Clippie AI + Canva integrated workflow:
Monday content creation (1.5 hours):
Upload images to Clippie AI (5 minutes)
Drag-and-drop 12 images
Batch select → "Remove Background"
Processing: 60 seconds (all 12 images)
Export transparent PNGs (2 minutes)
Download all (ZIP file)
Extract to folder
Design in Canva (60 minutes)
Import background-removed images to Canva
Design as usual (templates, text, branding)
Export
Schedule (15 minutes)
Total weekly time: 1.5 hours
Time savings: 1.5 hours weekly (50% reduction)Annual time savings: 78 hours (nearly 2 full work weeks reclaimed)

YouTube Thumbnail Optimization
The thumbnail science:
CTR correlation: Thumbnails with isolated subjects achieve 15-35% higher CTR (vs. cluttered backgrounds)
Visual hierarchy: Eye drawn to subject first (then text, then context)
A/B testing: Need multiple versions (test which background color, subject position performs best)
Thumbnail creation workflow:
Scenario: YouTuber creating 4 videos monthly, each needs 3 thumbnail variations for testing = 12 thumbnails
Step 1: Photograph thumbnail expressions (30 minutes)
Set up camera (phone or DSLR on tripod)
Film thumbnail takes (exaggerated expressions, surprise, excitement, curiosity, shock)
Capture stills (20-30 expressions, select best 4)
Step 2: Background removal (2 minutes with Clippie AI)
Upload 4 selected images
Batch remove backgrounds
Download transparent PNGs
Step 3: Design 3 variations per video (60 minutes)
Using Canva/Photoshop/Figma:
Variation A: Bright gradient background
Import background-removed subject
Add vibrant gradient (orange-to-pink, blue-to-purple, etc.)
Bold text overlay (video title, hook)
Position subject (left, right, or center, test what works)
Variation B: High-contrast solid color
Same subject, different background (solid red, yellow, blue)
Different text treatment (outlined, shadowed, color variations)
Variation C: Contextual blur
Background: Blurred version of video scene (viewer gets context)
Subject: Sharp, background-removed overlay (pops against blur)
Text: Minimal (subject + background tell story)
Step 4: A/B test (YouTube Studio feature)
Upload all 3 variations to YouTube
Enable A/B testing (YouTube rotates thumbnails, measures CTR)
After 24-48 hours: YouTube declares winner (highest CTR)
Winning thumbnail becomes permanent
Results:
Typical CTR improvement: 15-40% (optimized thumbnail vs. random frame from video)
Revenue impact: 10,000 impressions at 3% CTR = 300 views, 10,000 impressions at 5% CTR = 500 views
67% more views from thumbnail optimization (500 vs. 300)
Why background removal essential:
Subject prominence: Isolated subject draws eye (15-30% larger in thumbnail vs. cluttered background)
Flexibility: Change background color based on A/B test results (test 5+ backgrounds without re-shooting)
Consistency: Create recognizable thumbnail style (all your videos use similar background treatment, brand building)
Story and Reel Overlays
Instagram/TikTok/Facebook Story graphics:
Format requirements:
Vertical 9:16 (1080×1920 pixels)
Text and graphics must fit in "safe zone" (avoiding profile icon, UI elements)
Common story types needing background removal:
1. Product showcase story:
Background-removed product image
Placed on gradient or solid color (brand colors)
Text: "NEW ARRIVAL" or "SALE: 30% OFF" or "Link in bio"
CTA sticker: "Shop Now" or "Swipe Up" (if applicable)
2. Behind-the-scenes story:
Background-removed photo of creator (you working, coffee in hand, casual)
Placed on blurred background (your workspace, creating context)
Text: Day-in-life caption, relatable message
3. Testimonial/quote story:
Background-removed customer photo (with permission)
Placed on branded template
Quote overlay (their testimonial)
Creates social proof (real person, real review)
Production efficiency:
Manual creation:
Photoshop background removal: 5-10 minutes per story
7 daily stories = 35-70 minutes daily (unsustainable)
Clippie AI workflow:
Batch process week's worth: 30-50 images (for variety) × 5 seconds = 2.5-4 minutes total
Daily story creation: Select from pre-processed images, design in Canva/Unfold/InShot (5-10 minutes)
Time savings: 30-60 minutes daily (90% reduction in background removal time)
5. How to Get Transparent PNG Backgrounds
Understanding Transparency (Alpha Channels)
What is image transparency:
Opaque image (JPG, no transparency):
Every pixel has color (RGB values: Red, Green, Blue)
No transparent pixels (entire rectangular image area filled with color)
Transparent image (PNG with alpha channel):
Every pixel has color PLUS opacity (RGBA: Red, Green, Blue, Alpha)
Alpha channel: 0% = fully transparent (invisible), 100% = fully opaque (solid)
Allows: Subject visible, background invisible (cutout effect)
Why PNG format required:
JPG: No alpha channel support (can't store transparency)
PNG: Supports alpha channel (can be fully transparent, fully opaque, or semi-transparent)
GIF: Supports transparency but only binary (100% opaque or 100% transparent, no semi-transparency, rough edges)
Semi-transparency critical for quality:
Example: Hair edges
Individual hair strands: Fine, wispy (partially cover background)
Need: 20-80% opacity at edges (realistic blend, not harsh cutout)
PNG alpha channel: Stores these varying opacity levels
Result: Natural-looking hair (soft blend, not jagged edge)
Exporting Transparent PNGs from Clippie AI
Step-by-step:
Step 1: Background removal completed
Image already processed (background removed, subject isolated)
Viewing in Clippie AI (preview shows checkered background = transparency indicator)
Step 2: Access export settings
Click on processed image → "Export" or "Download"
Or: Select multiple images → "Bulk Export"
Step 3: Choose format settings
Format: PNG
Critical: Select PNG (not JPG, JPG has no transparency)
PNG options may include:
PNG-8: 256 colors (smaller file size, lower quality, avoid unless necessary)
PNG-24: 16.7 million colors (standard, high quality, good file size)
PNG-32: PNG-24 + full alpha channel (best quality, transparency support)
Recommended: PNG-24 or PNG-32 (quality + transparency)
Background:
Select "Transparent" (not white, not color)
Confirm checkered preview (indicates transparency preserved)
Resolution:
Match use case:
Social media: 1080×1080 to 1920×1080 (adequate)
Print: 2400×2400 to 4000×4000 (high-res)
Web: 1200×1200 to 2000×2000 (good quality, reasonable file size)
Step 4: Download
Click "Download" or "Export"
Save to computer (organized folder structure recommended)
Step 5: Verify transparency
Open downloaded PNG in image viewer or design tool
Check: Background shows as checkered pattern (indicating transparency) or invisible if placed on colored background
Test: Place on different color backgrounds (should blend seamlessly)
Using Transparent PNGs in Design Tools
Canva (most popular for non-designers):
Open Canva → Create design (Instagram Post, Presentation, Flyer, etc.)
Click "Uploads" → Upload your transparent PNG
Drag PNG onto canvas
Background is transparent → Whatever's on canvas behind PNG shows through
Arrange as needed (resize, position, layer with other elements)
Adobe Photoshop:
File → Open → Select PNG
PNG opens with transparent background (checkered pattern visible)
Add new layer below PNG (becomes background)
Paint, add gradient, import photo (background layer)
Subject (PNG layer) composites on top
PowerPoint/Google Slides:
Insert → Image → Upload PNG
PNG imports with transparency (background invisible)
Can layer over slide backgrounds, photos, other elements
Video editors (Premiere Pro, Final Cut, DaVinci Resolve):
Import PNG to project
Place PNG on video layer above background footage/color
PNG subject composites over video (overlay effect)
Animate position, scale (motion graphics)
Word processors (Word, Google Docs):
Insert → Image → PNG
Choose text wrapping: "In front of text" (PNG floats over document)
Resize, position anywhere (transparency allows text/content to show around subject)
Common Transparency Issues and Fixes
Issue 1: White halo around subject
Cause:
AI removed background but left thin white fringe (semi-transparent pixels with white color)
Happens when photographed against white/light background
Fix in Clippie AI:
Use "Defringe" or "Remove Color Spill" option (if available)
Analyzes edge pixels, removes color contamination
Result: Clean edges, no white halo
Manual fix (Photoshop if needed):
Layer → Matting → Defringe (set 1-2 pixels)
Or: Layer → Matting → Remove White Matte
Issue 2: Transparency checkerboard shows in final export
Cause:
User error: Exported as JPG instead of PNG
Or: Design tool flattened layers (merged transparency with white background)
Fix:
Re-export as PNG (ensure "Transparency" checked)
In design tool: Don't flatten layers before export (keep transparency)
Issue 3: Transparent PNG looks jagged when placed
Cause:
Low-resolution source image (1024×768 or smaller)
Enlarged in design (2000×2000 canvas, 1024px image stretched = pixelation)
Fix:
Use higher resolution source (photograph at highest camera setting)
Or: Upscale image before background removal (AI upscaling tools, Topaz Gigapixel, Clippie AI built-in upscaling)
Prevention:
Always photograph at maximum resolution (phone default: 12MP+, DSLR: 24MP+)
Even if final use is web (1080p), having high-res source allows flexibility (print later, zoom crops, etc.)
6. Best Image Types for Clean Cutouts
Subject Types Ranked by AI Accuracy
Tier 1: Easiest (95-98% accuracy, minimal touch-up needed)
Simple products with defined edges:
Examples: Bottles, boxes, electronics, tools, furniture
Why easy: Hard edges, solid colors, clear distinction from background
Expected result: Perfect cutout, clean edges, zero artifacts
People with simple hairstyles:
Examples: Short hair, slicked back, pulled into tight bun
Why easy: Clean outline, minimal flyaway hair
Expected result: Excellent, natural edges
Animals with short fur:
Examples: Short-haired dogs (beagle, pit bull), cats (domestic shorthair)
Why easy: Fur lies flat, clear body outline
Expected result: Very good, minor edge softness acceptable
Tier 2: Moderate (90-95% accuracy, occasional touch-up)
Products with transparent elements:
Examples: Glass bottles, eyeglasses, plastic containers
Why challenging: Transparency and reflections (AI must preserve glass appearance while removing background)
Expected result: Good, may need manual refinement of transparent areas
People with medium-length hair:
Examples: Shoulder-length hair, wavy, some volume
Why challenging: Some flyaway strands, partial translucency at edges
Expected result: Good, minor hair cleanup occasionally needed
Clothing with texture:
Examples: Knit sweaters, fur collars, fringe
Why challenging: Texture creates complex edges (not solid line)
Expected result: Good, occasional thread/fringe missed
Tier 3: Challenging (85-92% accuracy, expect touch-up needed)
People with long, flowing hair:
Examples: Long hair (waist-length+), wind-blown, curly/frizzy
Why very challenging: Hundreds of individual strands, semi-transparent, overlapping
Expected result: Good foundation, manual refinement recommended for professional use
Fluffy animals:
Examples: Long-haired cats (Persian), dogs (golden retriever, Samoyed)
Why very challenging: Thousands of fine hairs, color variation, depth
Expected result: Acceptable for most uses, fur edges may be slightly simplified
Transparent objects in complex scenes:
Examples: Wine glass on patterned tablecloth, water droplets on colorful background
Why very challenging: AI must identify glass vs. background pattern visible through glass
Expected result: Usable starting point, requires manual cleanup for perfection
Tier 4: Very Challenging (70-85% accuracy, significant manual work expected)
Fine details on busy backgrounds:
Examples: Bicycle spokes against trees, necklace chain against patterned shirt
Why extremely challenging: Detail size smaller than AI's effective resolution
Expected result: Rough cutout, manual refinement essential
Similar subject and background colors:
Examples: White dog on snow, green shirt against green leaves
Why extremely challenging: AI relies partially on color contrast (limited in these cases)
Expected result: Decent but imperfect, edges may cut into subject or include background
Photography Tips for Better AI Results
Tip 1: Contrast is king
The principle:
AI accuracy improves 15-30% with high subject-background contrast
Contrast helps AI confidently identify edge location
How to maximize contrast:
For product photography:
Dark products: Photograph on white/light background (black phone case on white table)
Light products: Photograph on dark background (white candle on black cloth)
Avoid: Similar colors (red apple on red surface = difficult)
For portraits:
Choose clothing contrasting with planned background (if photographing against white wall, wear dark clothing)
Or: Don't worry about background color (AI handles reasonably well regardless, but contrast helps)
For animals:
Dark-furred pets: Outdoor photos on sunny day (bright background)
Light-furred pets: Shaded areas or indoor against darker wall
Tip 2: Avoid complex, busy backgrounds
The challenge:
Busy backgrounds confuse AI (many colors, patterns, objects)
AI may include background elements (thinking they're part of subject) or exclude subject parts (thinking they're background)
Simple background examples (AI loves these):
Solid color walls (white, gray, beige)
Clear sky (blue, overcast white)
Blurred backgrounds (shallow depth of field, subject sharp, background soft blur)
Clean floors (wood, concrete, plain carpet)
Complex backgrounds to avoid (if possible):
Patterned wallpaper (florals, geometric designs)
Cluttered rooms (shelves, furniture, decorations visible)
Outdoor foliage (trees, bushes, lots of overlapping detail)
When stuck with complex background:
Use anyway (AI still attempts removal, often succeeds 80-90%)
Expect: More manual touch-up needed (5-10 minutes vs. 0-2 minutes with simple background)
Tip 3: Good lighting eliminates shadows that confuse AI
The shadow problem:
Hard shadows:
Bright directional light (midday sun, single harsh lamp) creates dark, defined shadows
AI may think shadow is part of subject (includes shadow in cutout, looks weird on new background)
Soft, even lighting (ideal):
Overcast day (clouds diffuse sunlight evenly)
Multiple light sources (two lamps at 45-degree angles eliminate harsh shadows)
Ring light (for portraits, creates soft, flattering light)
Lighting setup for product photography:
Window light on overcast day (free, beautiful, soft)
Or: Two desk lamps with white paper diffusers (DIY softboxes, softens light)
Position: 45 degrees left and right of subject (eliminates harsh shadows)
Tip 4: Resolution matters (photograph at highest quality)
Why resolution critical:
AI works at pixel level (analyzes edges, colors, textures)
Low resolution = less detail = AI has less information = lower accuracy
High resolution = AI can see fine detail = better edge detection
Minimum recommended:
1920×1080 (1080p, 2MP): Acceptable for AI processing (results adequate for web use)
3264×2448 (8MP): Good (typical smartphone camera, very good results)
4000×3000 (12MP): Excellent (modern phone default, professional results)
When to use maximum:
Product photography for e-commerce (zoom feature requires high-res)
Print materials (300 DPI at print size = large pixel dimensions)
Professional portfolios (maximum quality expected)
Camera settings:
Phone: Use default camera app (highest quality automatic)
DSLR/mirrorless: RAW if post-processing, highest quality JPG if not
7. FAQs About Photo Background Removal
Can I remove backgrounds from photos on my phone?
Answer: Yes, multiple options for mobile background removal with varying quality and convenience, from dedicated apps to integrated tools within content creation platforms
Option 1: Dedicated mobile apps
PhotoRoom (iOS and Android):
Features: AI background removal, built-in templates, magic retouch
Free tier: Limited monthly uses (5-10 images typically)
Paid: $10-$15/month unlimited
Quality: Very good (8.5/10, optimized for product photos)
Best for: Product sellers, small business owners using mobile workflow
Remove.bg app (iOS and Android):
Features: Quick background removal, preview quality free
Free tier: Unlimited preview quality (low-res), HD requires payment
Paid: Credit-based ($0.20-$0.60 per HD image depending on package)
Quality: Excellent (9/10, industry-standard accuracy)
Best for: Occasional use, those who need few images monthly
Adobe Photoshop Express (iOS and Android):
Features: Background removal + basic editing suite
Free tier: Available with Adobe account
Paid: Adobe Creative Cloud subscription ($9.99-$54.99/month depending on plan)
Quality: Very good (8/10)
Best for: Adobe ecosystem users already subscribing
Background Eraser (Android specifically):
Features: Manual + AI removal, works offline
Free tier: Ad-supported
Paid: $2.99 one-time (removes ads, unlocks features)
Quality: Good if manual refinement done (7-8/10)
Best for: Budget-conscious Android users
Option 2: Mobile web browsers
Process:
Open mobile browser (Chrome, Safari)
Navigate to Remove.bg website or similar web tool
Upload photo from phone
Download result
Advantages:
No app installation required
Works on any phone (iOS, Android)
Disadvantages:
Mobile browser interface cramped (harder to use than native app)
Upload/download on cellular data (uses data allowance)
Option 3: Integrated within content creation apps
Canva mobile app:
Background removal built-in (Pro subscribers)
Workflow: Import photo → Background Remover tool → Design with transparent PNG
Advantage: Seamless (remove background, design graphic, post to social, all in one app)
Clippie AI mobile (if available):
Integrated background removal within video/content creation
Workflow: Upload images → Toggle background removal → Use in video/graphic
Which mobile option to choose:
For occasional personal use (1-5 images monthly):
Remove.bg app or website (free preview quality adequate for social media)
For regular product photography (10-30 images monthly):
PhotoRoom app ($10-$15/month, designed specifically for product sellers)
For content creators making graphics regularly:
Canva Pro mobile ($12.99/month, includes background removal + design tools)
For video creators needing images in videos:
Integrated workflow like Clippie AI (eliminates file management, direct image-to-video)
Mobile quality expectations:
Mobile AI background removal matches desktop quality (same algorithms)
Limitation: Mobile screen smaller (harder to review fine details, manual refinement challenging)
Recommendation: For critical professional use, desktop review advisable (remove background on phone, review and refine on computer if needed)
What's the difference between free and paid background removal tools?
Answer: Free tools adequate for occasional use with resolution/quota limits, paid tools necessary for professional volume, quality control, and workflow integration, with pricing $10-$35/month for unlimited vs. $0.02-$0.60 per image a la carte
Free tier limitations (typical across tools):
1. Resolution restrictions:
Free output: 612×408 to 1200×1600 pixels (varies by tool)
Use case: Social media, web graphics (acceptable)
Not suitable: Print, high-res product photography, professional portfolios
2. Monthly quotas:
Remove.bg free: Unlimited but preview quality only (low-res)
PhotoRoom free: 5-10 images per month
Canva free: 5-10 background removals monthly
Clippie AI: Included in subscription (not standalone free tier, but unlimited within Creator plan)
3. Watermarks (some tools):
Some free tiers add watermark to output (tool branding)
Requires paid upgrade to remove
4. No batch processing:
Free: Upload one image at a time (manual, repetitive)
Paid: Upload 50-100 images, process simultaneously (massive time savings)
5. No API access:
Free: Manual uploads only
Paid: Programmatic integration (automate workflows, integrate with e-commerce platforms)
Paid tier advantages:
1. Full resolution:
Output up to source resolution (12MP, 24MP, whatever your camera captures)
Suitable for: Print, professional portfolios, e-commerce zoom features
2. Unlimited processing (most plans):
$10-$35/month: Process hundreds or thousands (no per-image counting)
Ideal for: Businesses, content creators, regular users
3. Batch processing:
Upload 50-100 images in single operation
AI processes simultaneously (parallel, not sequential)
Time savings:
100 images in 5 minutes vs. 3-5 hours (one-by-one with download between each)
4. Advanced features:
Manual refinement tools (brush to include/exclude areas)
Shadow handling (preserve, remove, or generate custom)
Edge feathering (adjust softness for natural blending)
Background replacement (not just removal, add new solid color or image background)
5. Priority processing:
Free tiers: Queued (slower during peak times)
Paid: Priority servers (instant or near-instant processing)
6. Commercial licensing:
Free tiers: Often restricted to personal use
Paid: Commercial use permitted (use for business, client work, resale)
Pricing comparison:
A la carte (pay per image):
Remove.bg: $0.20-$0.60 per HD image (depends on package, bulk discounts)
Best for: Very occasional use (1-5 images monthly)
Monthly subscription (unlimited or high quota):
PhotoRoom Pro: $10-$15/month
Canva Pro: $12.99/month (includes background removal + design tools)
Adobe Photoshop: $31.49/month Photography plan (includes Photoshop + Lightroom + background removal)
Clippie AI Creator: $34.99/month (includes background removal + video creation + AI voices + more)
Cost-benefit analysis:
Scenario: Small business removing backgrounds from 50 products monthly
Option A: Free tool (Remove.bg preview quality)
Cost: $0
Time: 50 images × 3 minutes (upload one-by-one, download) = 150 minutes
Quality: Preview quality (adequate for web, not print)
Suitable if: Budget zero, time available, web-only use
Option B: Pay-per-image (Remove.bg HD)
Cost: 50 × $0.40 = $20/month
Time: 150 minutes (still manual one-by-one)
Quality: Full HD (print-suitable)
Suitable if: Occasional (some months 10 images, other months 50, variable volume)
Option C: Subscription (PhotoRoom Pro $12/month)
Cost: $12/month
Time: 10 minutes (batch upload, bulk download)
Quality: Full HD
Suitable if: Consistent volume (every month needs background removal), value time savings
Option D: Integrated platform (Clippie AI Creator $34.99/month)
Cost: $34.99/month
Time: 5 minutes (integrated workflow, no separate tool)
Quality: Full HD
Additional value: Also creating videos, graphics, social content with same images
Suitable if: Content creator or business doing video + images (value workflow integration)
Recommendation:
1-10 images monthly: Free tools adequate
10-50 images monthly: Paid subscription economical ($10-$15/month)
50-500 images monthly: Batch-capable paid tool essential (time savings alone worth cost)
Content creators (video + images): Integrated platform (Clippie AI) eliminates workflow friction
How accurate is AI background removal compared to manual Photoshop?
Answer: Modern AI (2026) achieves 92-98% accuracy matching expert manual Photoshop work for standard subjects (portraits, products) in 2-5 seconds vs. 15-60 minutes manual, with 85-95% accuracy on complex subjects (long hair, fur, transparent objects) providing excellent starting point for refinement
Accuracy benchmarks by subject complexity:
Simple subjects (products, short hair portraits, solid edges):
AI accuracy: 95-98% (indistinguishable from manual Photoshop by experts)
Manual Photoshop accuracy: 98-100% (human can be slightly more precise, but difference imperceptible)
Verdict: AI matches professional manual work for 95%+ of standard use cases
Moderate complexity (medium hair, textured clothing, moderate shadows):
AI accuracy: 90-95% (very good, minor imperfections in 5-10% of edge areas)
Manual Photoshop (expert): 98-100% (can handle complexity with advanced techniques)
Verdict: AI provides excellent results, occasional touch-up improves to perfection
High complexity (long flowing hair, fur, transparent objects, low contrast):
AI accuracy: 85-92% (good foundation, visible imperfections requiring refinement)
Manual Photoshop (expert): 95-100% (time-intensive but achieves near-perfection)
Verdict: AI excellent starting point (85-92% done automatically), manual refinement completes (faster than pure manual, 10-15 minutes to perfect vs. 60-120 minutes from scratch)
Edge quality comparison:
Photoshop Magic Wand (beginner tool):
Edge type: Hard, aliased (stair-step appearance)
Accuracy: 60-80% (many errors, background remnants or subject parts missing)
AI is dramatically better (AI 92-98% vs. Magic Wand 60-80%)
Photoshop Pen Tool (expert manual tracing):
Edge type: Vector-smooth (mathematically perfect curves)
Accuracy: 98-100% (human control over every anchor point)
Time: 30-90 minutes per image
AI is comparable quality in 2-5 seconds (AI 95-98% in seconds vs. manual 98-100% in hour)
Photoshop Channel Masks (advanced technique for hair/fur):
Edge type: Natural, soft (preserves fine detail)
Accuracy: 95-100% (best manual method for complex edges)
Time: 20-40 minutes per image
AI matches or approaches this quality (AI 90-95% for hair vs. manual 95-100%, AI in seconds vs. manual in 20-40 minutes)
Where AI excels over manual:
1. Consistency:
Manual: Quality varies (fatigue, human error, skill level differences)
AI: Consistent quality (every image processed with same algorithm, no fatigue)
2. Speed:
Manual: 15-60 minutes per image (expert), 30-120 minutes (beginner)
AI: 2-5 seconds per image
3. Batch processing:
Manual: Must process one-by-one (sequential, time-consuming)
AI: Process 50-100 simultaneously (parallel processing, massive time savings)
Where manual Photoshop still superior:
1. Artistic judgment:
AI: Follows rules (algorithm-based decisions)
Human: Creative decisions (intentionally include shadow, stylistically soften edge, artistic choices)
2. Unusual subjects:
AI: Trained on common subjects (people, products, animals)
Struggles: Rare subjects AI hasn't seen (exotic animal, unusual object, abstract art)
Human: Can adapt to anything (understands concept of subject vs. background regardless of training data)
3. Contextual understanding:
Example: Photo of person holding clear glass
AI challenge: May remove glass (thinks it's background because transparent)
Human: Knows glass is subject's prop (keeps it)
The hybrid approach (best of both worlds):
Professional workflow (2026 standard):
AI background removal (95% of work done in 2-5 seconds)
Human review (identify any errors, takes 30-60 seconds)
Manual touch-up if needed (5-10 minutes for complex subjects, 0 minutes for simple)
Total time: 0-10 minutes (vs. 30-90 minutes pure manual)
Quality: 98-100% (AI speed + human precision)
Example:
Portrait with long hair photographed outdoors
AI processing: 95% accurate (body perfect, hair mostly perfect, 3-4 missed strands)
Manual refinement: Zoom to hair, brush tool include missed strands (3 minutes)
Result: Perfect cutout in 3 minutes vs. 45 minutes pure manual (93% time savings)
Bottom line: AI matched expert-level quality for most use cases (2026 technology), making professional background removal accessible to everyone, manual Photoshop still has place for artistic control, unusual subjects, absolute perfection demands, but 90%+ of background removal needs met by AI alone
Can I remove backgrounds from old or low-quality photos?
Answer: Yes, AI can remove backgrounds from old/low-quality photos but with reduced accuracy (75-90% vs. 92-98% for high-quality images) and quality limitations (output resolution capped by source resolution, artifacts magnified), upscaling before processing recommended for best results
Challenges with old/low-quality photos:
Challenge 1: Low resolution
Old photo examples:
Film photos scanned at low resolution (800×600, 1024×768)
Early digital cameras (1-3 megapixels, 1280×960)
Screenshots or social media downloads (compressed, low-res)
Impact on background removal:
AI works at pixel level (less detail = harder to identify precise edges)
Accuracy: 75-85% (vs. 92-98% for modern high-res)
Edge quality: Softer, less precise (pixelation visible when examined closely)
Solution:
Upscale before processing:
Use AI upscaling tool (Topaz Gigapixel, Adobe Super Resolution, Clippie AI built-in upscaling)
1024×768 → 2048×1536 or higher (doubles resolution, preserves detail better)
Process upscaled image:
Background removal accuracy improves 10-20% (AI has more detail to work with)
Accept limitations:
Output quality limited by source (can't create detail that doesn't exist, but can maximize quality from what's available)
Challenge 2: Compression artifacts
Artifact examples:
JPG compression blocky artifacts (8×8 pixel blocks, especially in areas of similar color)
Old social media compression (Instagram/Facebook aggressive compression on old posts)
Impact:
Edges blurred or stepped (compression degrades edge definition)
Color banding (smooth gradients become visible bands)
AI may struggle with precise edge detection (artifacts confuse algorithm)
Solution:
Pre-process with noise reduction:
Photoshop: Filter → Noise → Reduce Noise
Online tools: Denoise.ai, AI-based noise reduction
Result: Cleaner image, AI accuracy improves 5-15%
Challenge 3: Faded colors (old film photos)
Problem:
Old photos lose contrast over time (colors fade, yellowing)
Low contrast = harder for AI (subject-background distinction unclear)
Solution:
Color correction before background removal:
Increase contrast (makes subject stand out)
Adjust saturation (restores color separation)
Tools: Photoshop, Lightroom, free online editors (Photopea, Pixlr)
Process corrected image:
AI accuracy improves 15-25% (enhanced contrast aids edge detection)
Challenge 4: Physical damage (scratches, tears, stains on old photos)
Problem:
Scratches across subject (AI may think scratch is edge)
Stains or discoloration (confuses subject-background boundary)
Solution:
Restore photo first:
Remove scratches (Photoshop Healing Brush, Clone Stamp)
Clean up stains (Spot Healing, Content-Aware Fill)
Online restoration services (if extensive damage, $10-$50 professional restoration)
Then background removal:
AI works on cleaned image (better accuracy)
Realistic expectations:
Scenario A: Old photo, basic quality (1024×768, moderate compression, faded colors)
Direct AI background removal: 75-80% accuracy (usable but imperfect)
With upscaling + color correction: 85-90% accuracy (much improved, minimal touch-up needed)
Time investment: 5-10 minutes pre-processing + 5 seconds AI + 5-10 minutes touch-up = 10-20 minutes total
vs. pure manual Photoshop 45-90 minutes (AI still massive time savings even with pre-processing)
Scenario B: Very old photo, poor quality (600×800, heavy damage, severely faded)
Direct AI: 60-70% accuracy (rough starting point, significant refinement needed)
With restoration + upscaling + color correction: 75-85% accuracy (better but still requires work)
Time investment: 20-30 minutes pre-processing + 5 seconds AI + 15-30 minutes touch-up = 35-60 minutes total
Recommendation: For precious old photos, consider professional restoration service first ($20-$100), then background removal (ensures best possible source material)
Best practices for old/low-quality photos:
Step 1: Assess quality
Resolution: 1000+ pixels on longest side? (acceptable) vs. <800 pixels (challenging)
Compression: Minimal artifacts (good) vs. heavy blocking (problematic)
Condition: Clean (good) vs. damaged/faded (needs restoration)
Step 2: Pre-process if needed
Upscale if <1500 pixels
Color correct if faded
Restore if damaged
Step 3: AI background removal
Process with realistic expectations (not perfection, but good starting point)
Step 4: Manual refinement
Budget 10-30 minutes for touch-up (depending on initial quality and AI accuracy)
Step 5: Accept or improve
For casual use: AI result likely adequate (even 75% accuracy acceptable for social media, personal use)
For professional/precious photos: Invest time in refinement (or hire professional, $15-$50 per image for background removal + restoration)
Conclusion: Choosing Your Background Removal Approach
Photo background removal in 2026 serves distinct use cases with varying volume, quality, and workflow requirements, where optimal approach depends on frequency (1-10 images monthly favor free standalone tools accepting resolution limits, 50-500 monthly require paid subscriptions enabling batch processing and unlimited exports, thousands monthly benefit from API integration automating workflows), quality demands (social media and web graphics adequately served by 85-95% AI accuracy, professional portfolios and print materials benefit from AI-plus-manual-refinement achieving 98-100% perfection, e-commerce product photography balances batch efficiency with marketplace compliance standards), and workflow context (isolated background removal tasks suited to standalone tools, content creators producing videos/graphics/social content gain efficiency from integrated platforms eliminating download-upload friction between background removal and content assembly). Modern AI background removal democratized what required $31.49-$54.99 monthly Photoshop subscriptions plus 40-80 hour learning curves mastering selection tools and layer masks, achieving 92-98% accuracy matching expert manual work for standard subjects (portraits, products, simple backgrounds) in 2-5 seconds vs. 15-60 minutes manual editing, with 85-95% accuracy on complex subjects (long hair, fur, transparent objects, shadows) providing excellent starting points for refinement completing professional results in 5-15 minutes hybrid workflows vs. 60-120 minutes pure manual approaches.
The three strategic approaches by use case:
Approach 1: Free standalone tools (Remove.bg preview quality, PhotoRoom free tier, browser-based options, adequate for occasional personal use 1-10 monthly images, social media graphics where compression hides imperfections, testing workflows before committing to paid solutions)
Approach 2: Paid standalone subscriptions ($10-$20 monthly PhotoRoom, Canva Pro, dedicated background removal services, optimal for regular users processing 10-100 monthly images, small businesses needing batch processing, freelancers serving clients requiring commercial licensing)
Approach 3: Integrated platform workflows (Clippie AI Creator $34.99/month including background removal within video/content creation, strategic for creators processing 50-500+ monthly images within broader content production, video creators needing background-removed elements as overlays, businesses producing multi-format marketing materials eliminating file management friction)
Choose free standalone tools if:
Processing 1-10 images monthly (occasional use, low volume)
Quality needs modest (social media posts, personal graphics where preview resolution adequate)
Budget absolutely zero (willing to accept resolution limits, manual one-by-one processing)
Testing background removal viability (exploring whether workflow benefits justify paid investment)
Choose paid standalone subscriptions if:
Processing 10-100 images monthly (regular need, moderate volume)
Quality critical (full resolution required for print, professional portfolios, e-commerce zoom features)
Batch processing valuable (time savings from simultaneous 50-100 image processing justify monthly cost)
Standalone task focus (background removal separate from other creative workflows, dedicated tool preferred)
Choose integrated platform workflows if:
Processing 50-500+ images monthly within video or graphic production (high volume integrated context)
Workflow efficiency paramount (eliminating download-reupload steps between background removal and video editing saving 30-60 minutes per project)
Multi-format content creation (producing videos, graphics, social posts, value single platform for all steps)
Team collaboration (multiple users accessing same assets, processed images available across projects)
For content creators, small businesses, and professional workflows requiring regular background removal (whether e-commerce product photography batch processing 50-500 images weekly, social media content creation needing 10-30 transparent PNGs weekly for graphic templates, YouTube thumbnail optimization testing multiple background variations per video, or video production incorporating 10-50 background-removed overlay elements per project), integrated platforms like Clippie AI eliminate the workflow friction preventing efficient high-volume processing: standalone tools require download processed images then re-upload to video editor/design tool creating file management overhead and context-switching delays, while integrated approaches enable upload-once workflows where background removal toggles within content creation environment delivering 90-95% time savings on multi-step projects requiring both background removal and downstream creative assembly.
The difference between creators attempting regular background removal who abandon systematic approaches within 2-3 months (frustrated by standalone tool friction, time investment exceeding value for sporadic viral content, inability to maintain volume-quality balance) and those efficiently processing hundreds of images monthly while maintaining creative output is not photography skill, editing expertise, or software budget, it's having production systems enabling: batch processing eliminating repetitive manual steps (50 images in 5 minutes vs. 150 minutes one-by-one), workflow integration preventing file management overhead (toggle background removal within content editor vs. download-reupload between tools), and quality-appropriate tool selection (free preview quality adequate for social media vs. full HD export for e-commerce vs. manual refinement for print) matching technical capabilities to actual use case requirements without over-investing in unnecessary features or under-investing causing quality compromises.
Ready to streamline your background removal workflow? Experience Clippie AI's integrated approach, remove backgrounds during content creation in single click rather than separate tool-switching process, enabling efficient batch processing and professional quality output without standalone tool friction.
Read more

How to Hit YouTube Monetization Fast With World Cup Content in 2026
How to reach YouTube monetization fast with World Cup content in 2026, the exact Partner Program thresholds, the Shorts path versus the watch-hours path, a tournament posting plan, and how to pass review without an inauthentic-content flag.

Highest-RPM Football Content Niches in 2026 (Ranked)
A ranked guide to the highest-RPM football content niches in 2026, what RPM is, why football sits mid-tier, how US/UK audiences lift it, seven football angles ranked by earning potential, and why analysis out-earns highlights.

How to Get Sponsorships for a Faceless Football Channel in 2026
A practical guide to landing sponsorships for a faceless football channel in 2026, what sponsors actually pay for, how to build a media kit with no face, finding and pitching brands, pricing a deal, and the mistakes that scare sponsors off.